|
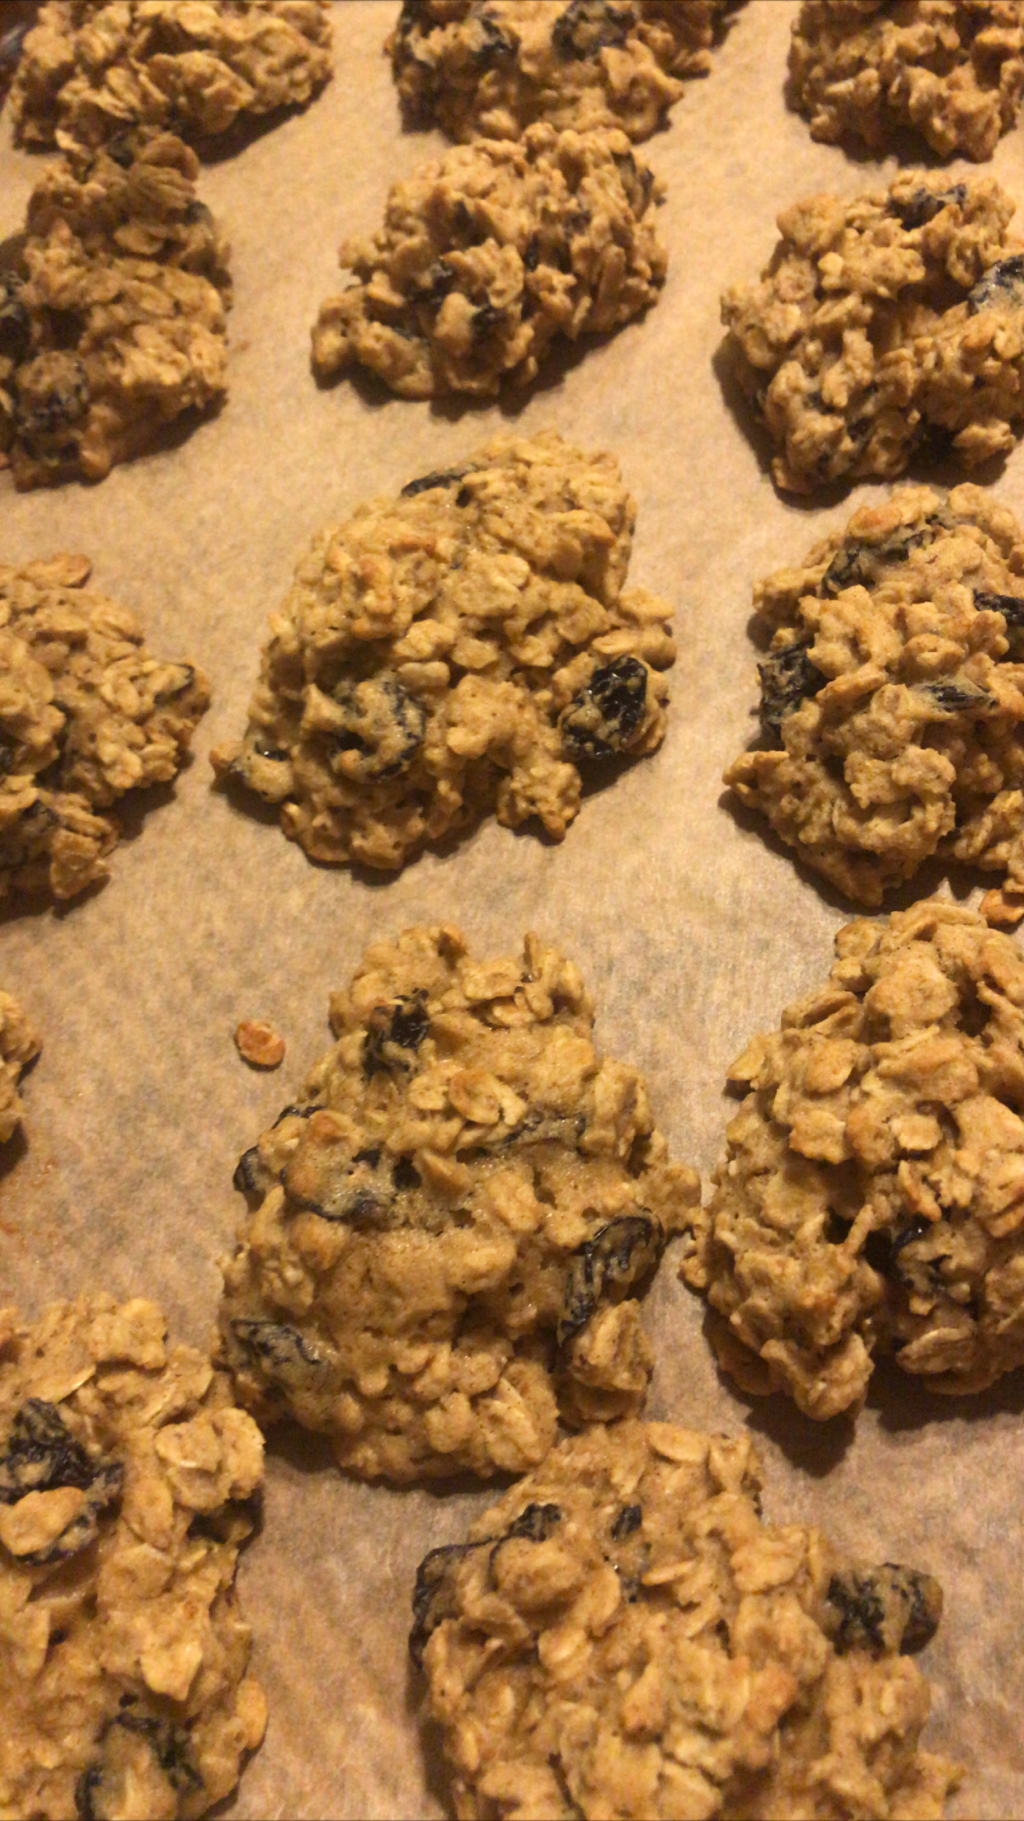
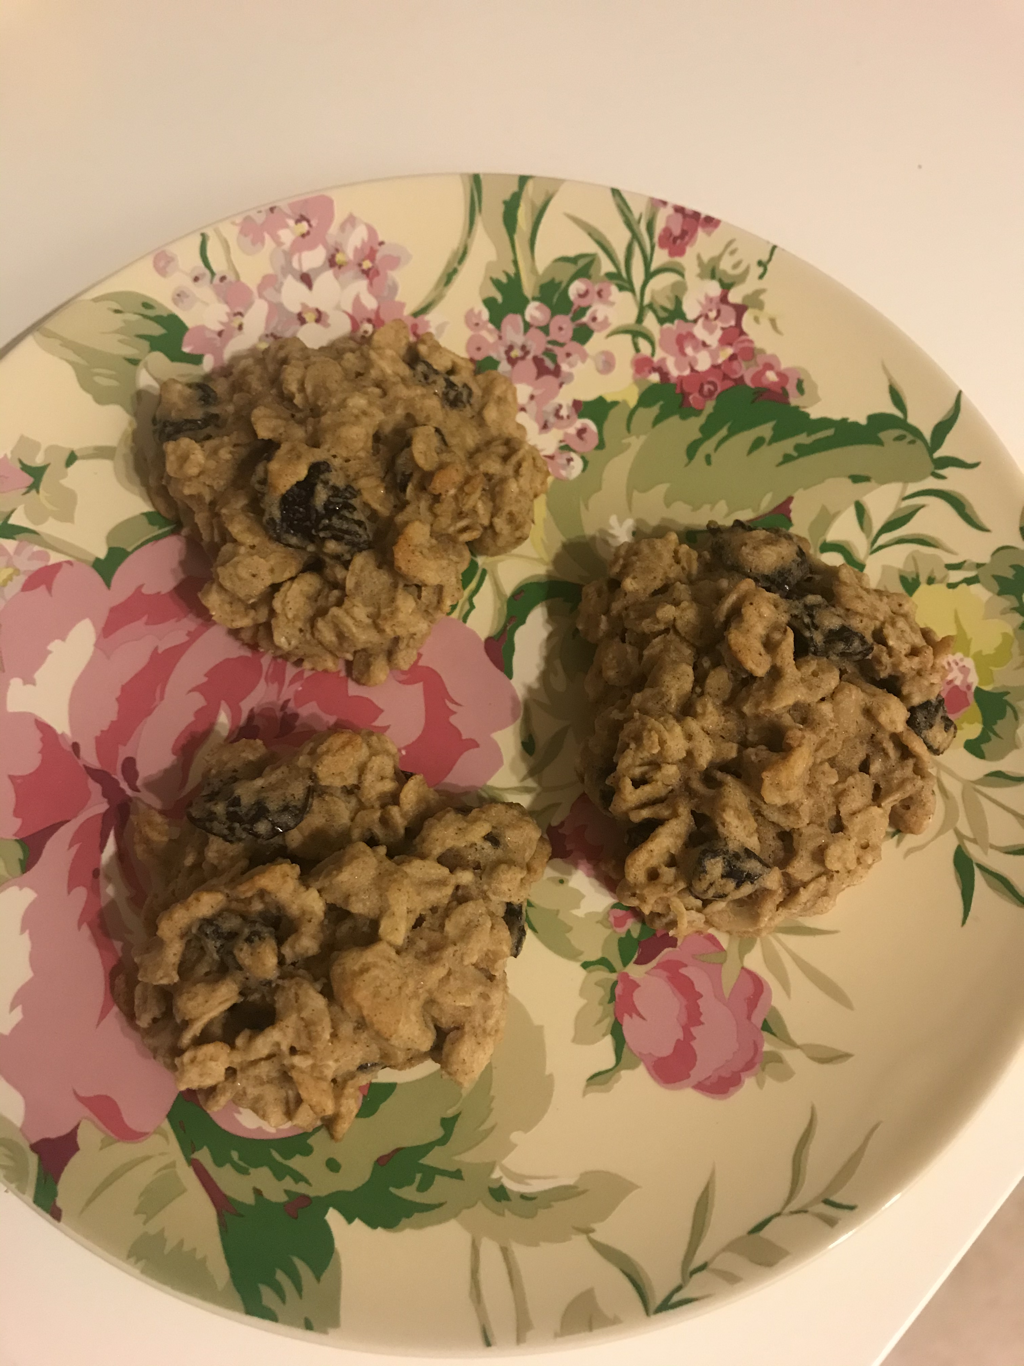
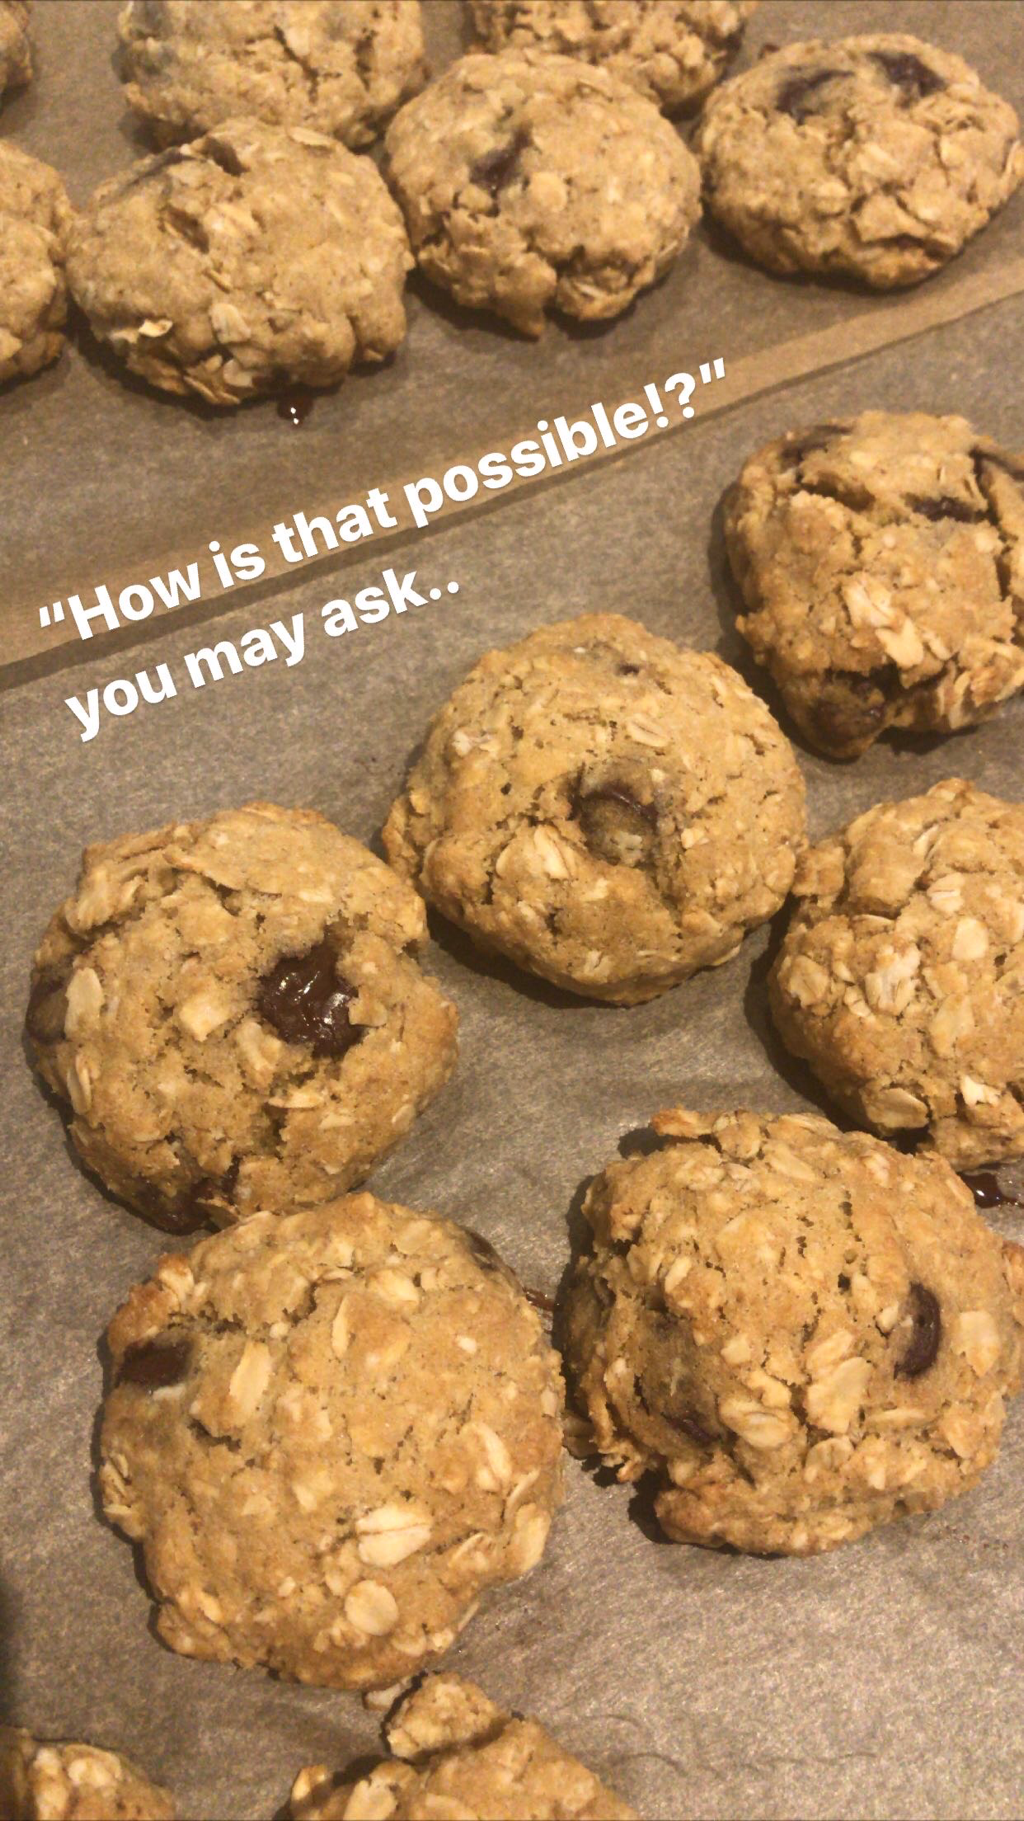
Perfect paired with a hot cup of coffee, these cookies are a great healthier swap for the traditional breakfast indulgences: pancakes, waffles, donuts. Bonus: they’re grab-and-go AND they’re easy to meal prep! Ingredients
Instructions
2 Comments
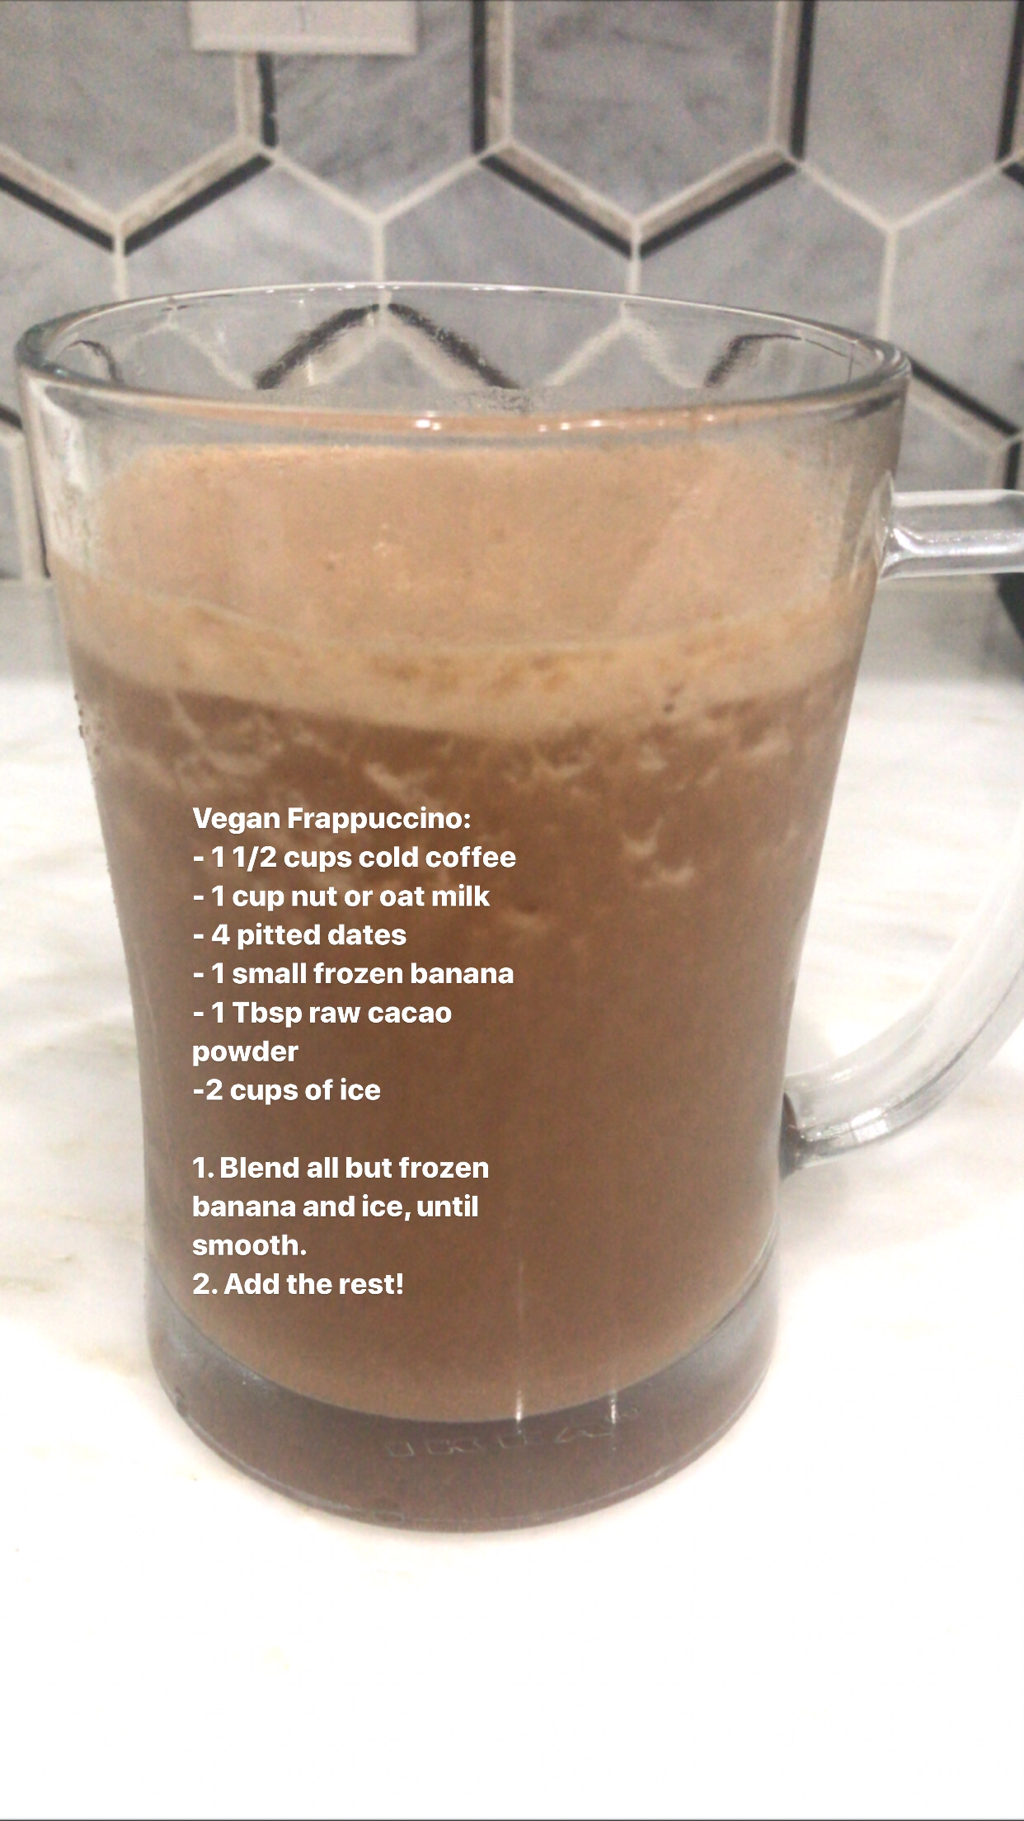
Sure, those sweet and creamy Frappuccinos served at Starbucks sometimes SOUND like the perfect pick-me-up, but with a whopping 52 grams of sugar, it can cause insulin spikes, fat storage, energy crash, and a feast for bad bacteria in your gut. If they still sound appetizing, I suggest measuring out 13 teaspoons of sugar for a more vivid picture! THIS lovely alternative is definitely worth trying AND after the purchasing all of the ingredients (which can all be found at Costco), you do end up saving money in the long run.
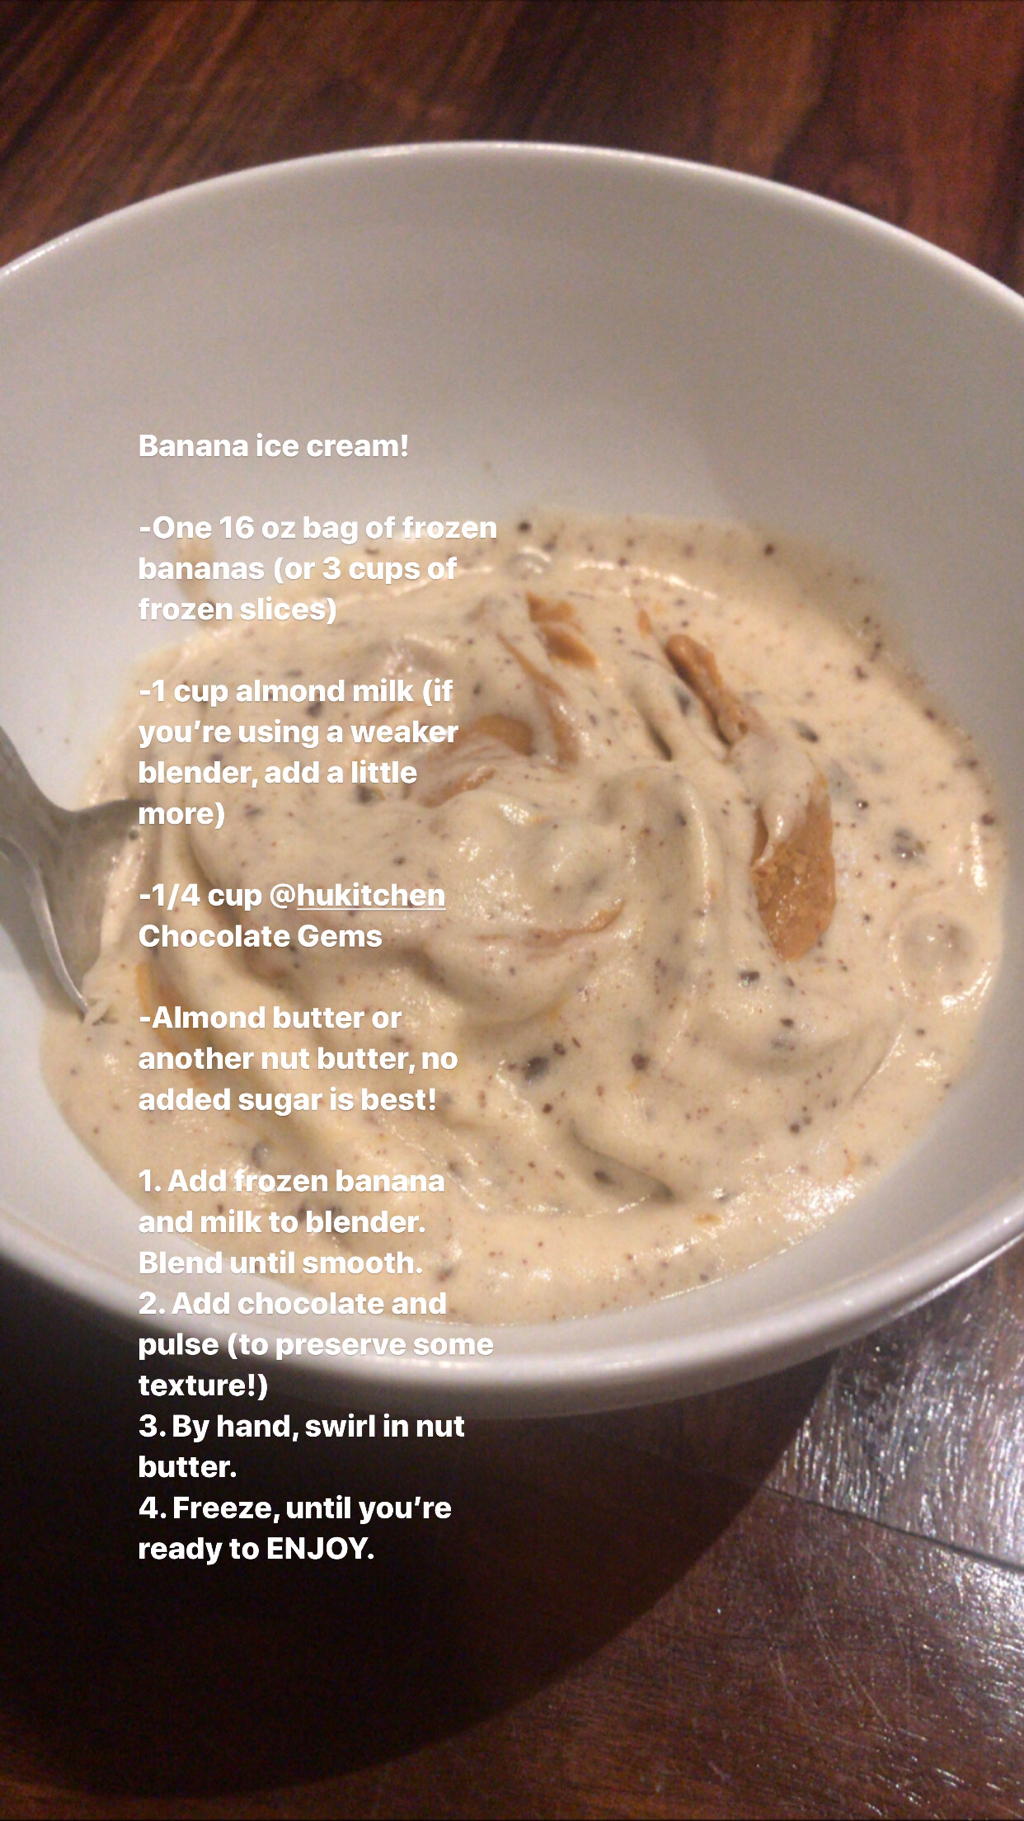
No life story. Just a recipe I came up with. Only thing I’ll say, it would be good with 1/4-1/3 cup chopped walnuts!
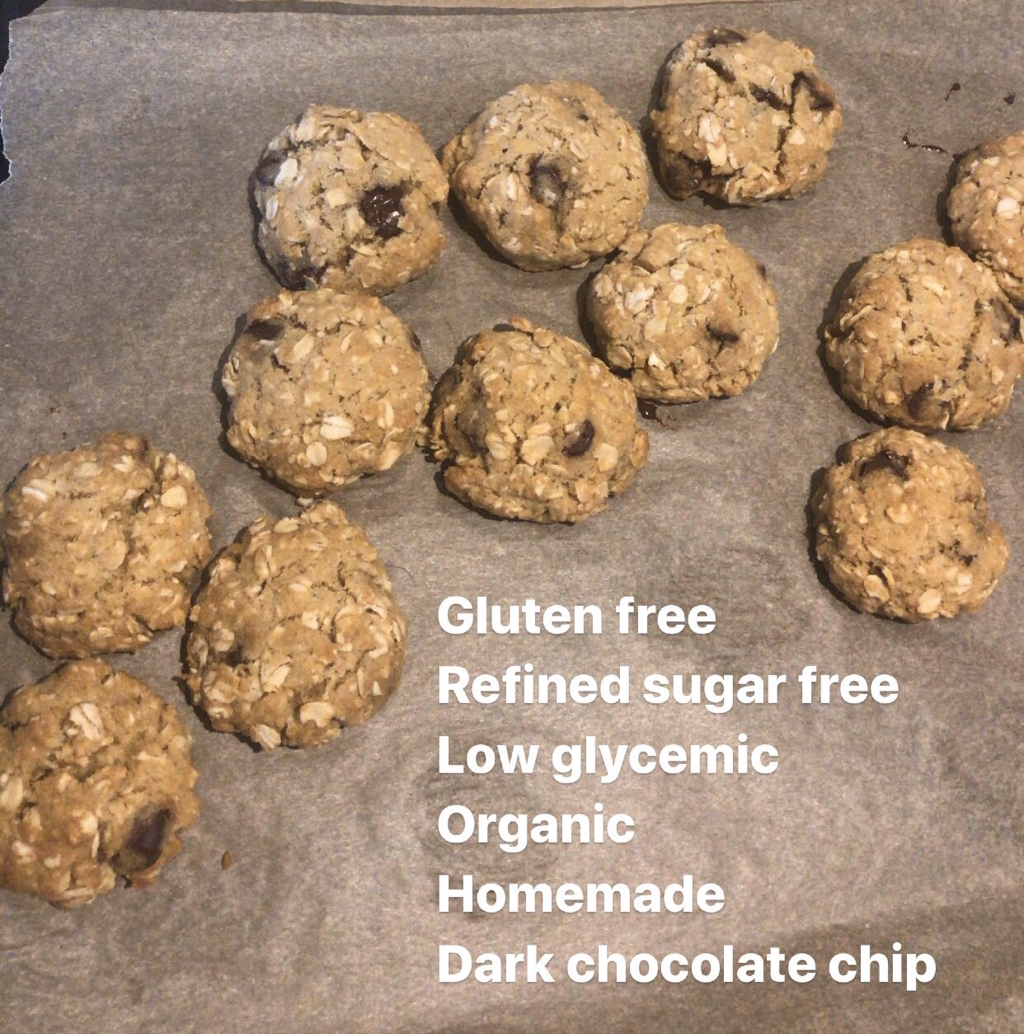
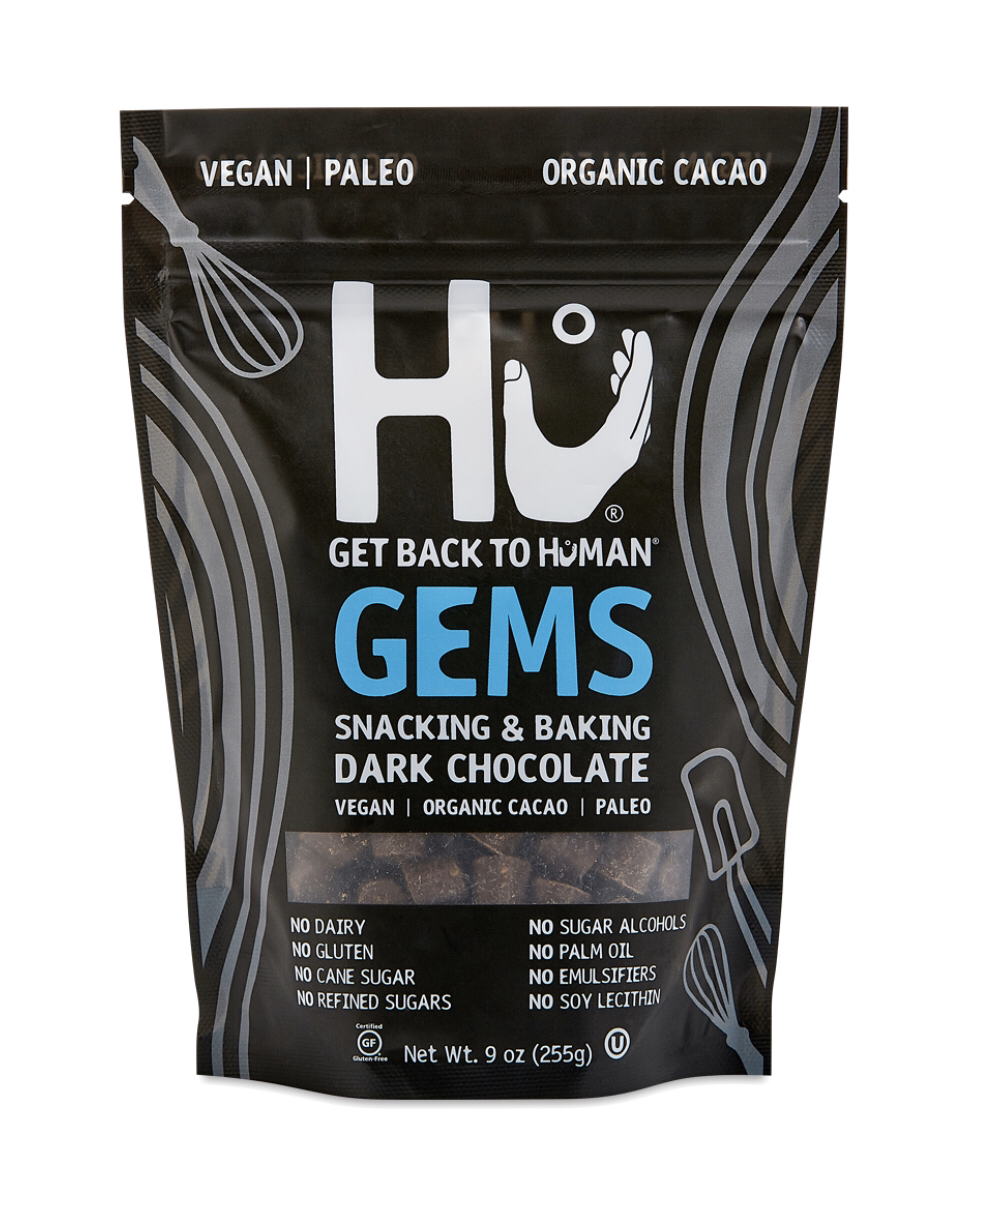
Chocolate Chip Oatmeal Cookies Ingredients: - 2 Cups brown rice flour - 2 3/4 Cups organic rolled oats - 1/2 Cup organic butter (1 stick, softened) or coconut oil - 3 organic eggs - 1 Cup organic brown coconut sugar - ½ of 9 oz. bag Hu Chocolate Gems - 1 Teaspoon baking soda - 1 Teaspoon sea salt or pink salt Preheat oven and bake at 375. Fully mix all ingredients together. Scoop approx. a golf ball size of dough and lightly flatten into a disk. The cookies will grow as they bake so make sure they're about 2 inches apart on baking sheet. Bake for 10-12 minutes until edges are golden brown. Because I haven’t been too great at keeping up with social media AND a blog, I’m going to start uploading highlights from my Instagram! My stories usually are a mix of my day— which include a little bit of everything, BUT always include lifestyle and wellness tips!
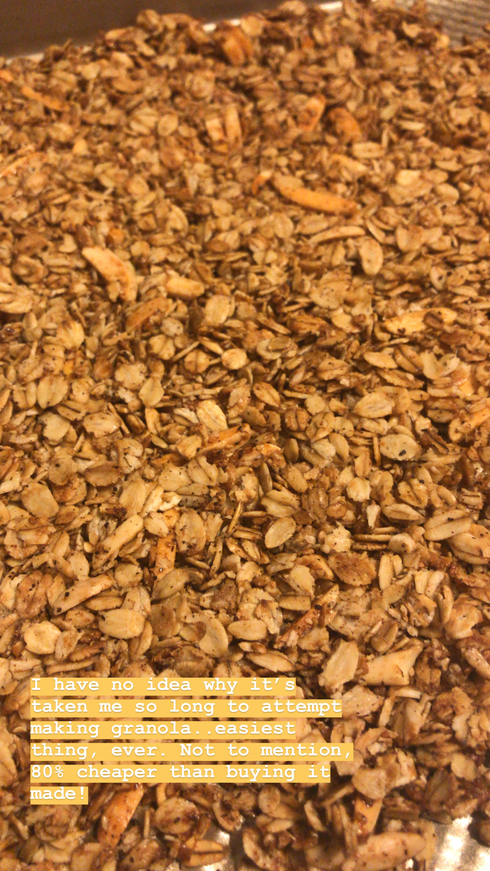
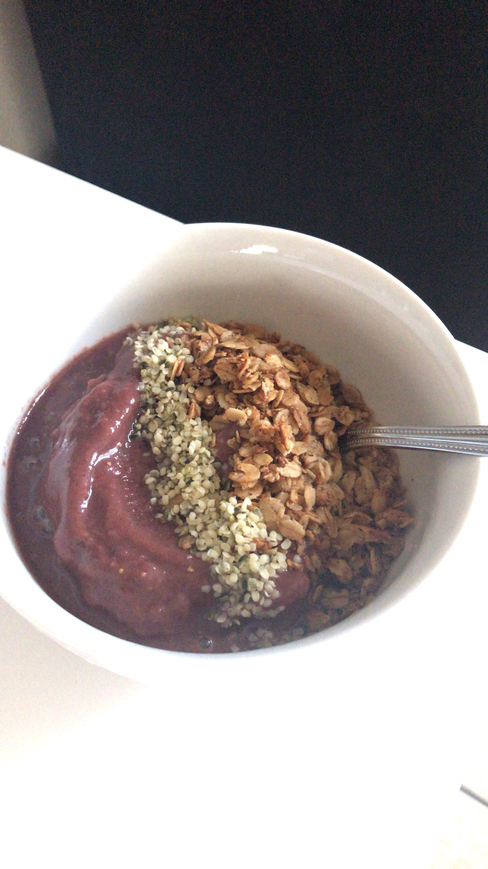
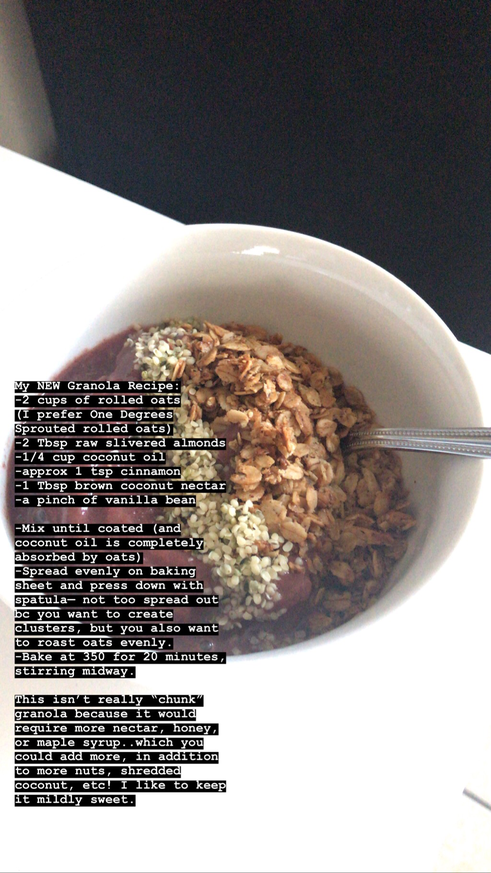
So happy I finally gave this a shot. It was actually a happy accident that I even felt prompted to make granola! I’ve been on an açaí bowl kick (I think I’m lacking vitamin C) and went to buy the ingredients, but failed to pick up something with a crunch to top it with. (I’m all about texture.) Luckily, I had everything I needed, did my typical recipe searches— to get a baseline idea on how long to cook/ what temp, and threw this together! One issue I’ve had with buying granola is that it commonly contains SO much sugar. Most companies use cane sugar (usually, in addition to other sugars), making your breakfast contain upwards of 6 TEASPOONS of sugar per serving. (Every 4 grams equals a teaspoon.) And I’m talking refined sugar..which makes an even bigger impact on your insulin, WHICH triggers “fat storage mode”, among other unfavorable things. This is why I prefer the moderate to low glycemic, natural sweeteners AND by making your own, you’re able to modify the amount of sweetness...in addition to adding bonus ingredients like superfood powders: cacao, collagen, etc. and bonus seasoning, nuts, you name it. *I do like Purely Elizabeth’s granola (she graduated from my school) because she uses brown coconut sugar. But, over the years, I have watched her prices climb to $7-9 a bag. So, if you’re in a bind and don’t want to fix it yourself, that brand is a great option! But it really is so simple, I’m happy to take it on myself for a fraction of the price! Sure, coffee is the traditional get-up-and-go, it contains beneficial antioxidants, but, for some, it’s a cup of anxiety. Coffee doesn’t actually provide energy, the caffeine just stimulates your adrenals, causing that jolt everyone seems to crave. But when you get that jump, in conjunction with the potential morning stressors, it can sometimes make you boil over.
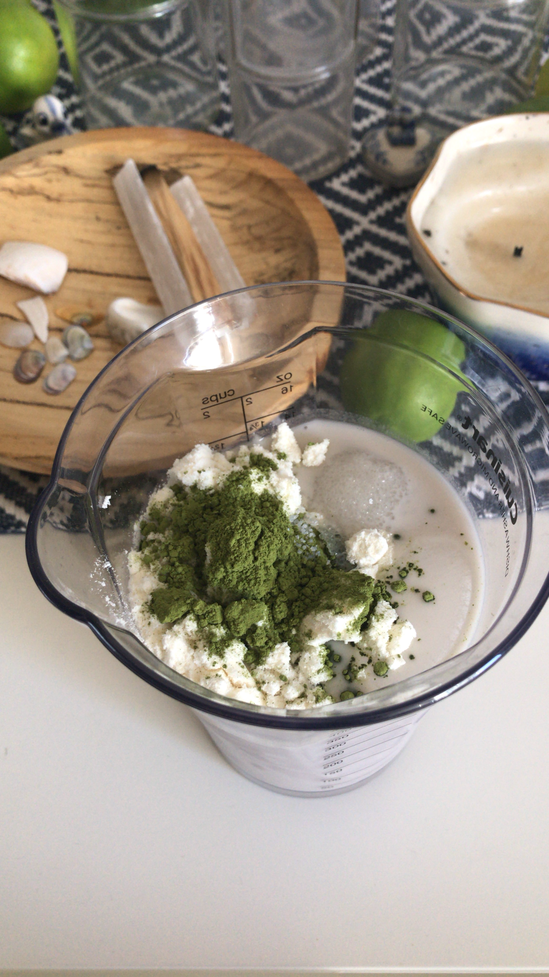
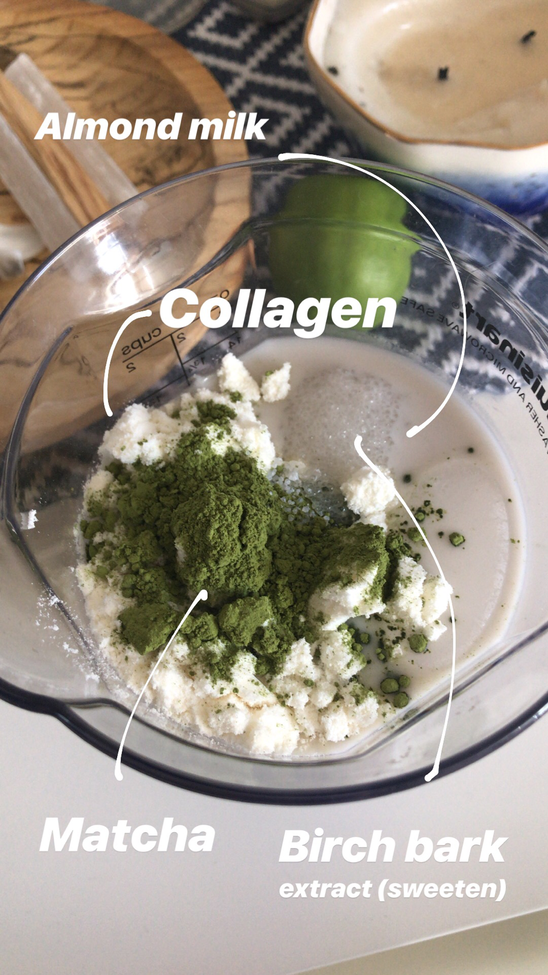
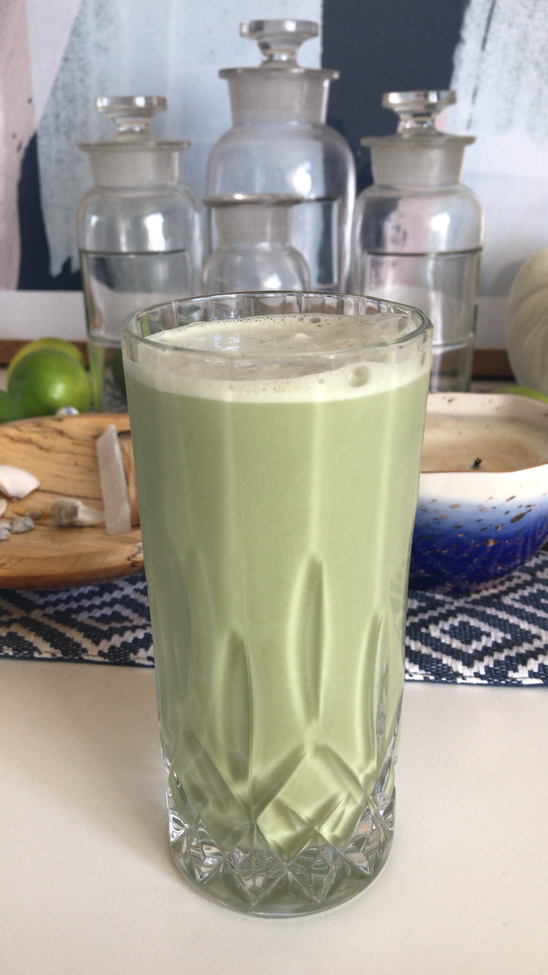
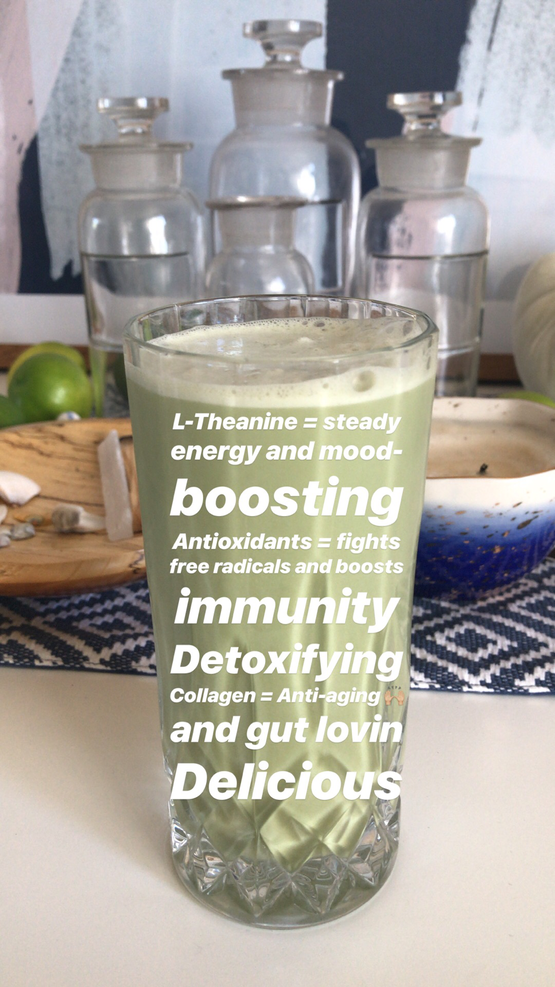
You’re reading your email and find that you shoulders are tightening, you’re taking audible breaths, maybe even feeling a tinge of anxiety...this all could be caused by fight-or-flight and/or too much adrenaline, which could eventually result in adrenal fatigue. Adrenal fatigue is a tricky one to come back from because it actually causes you to feel exhausted and lethargic and in order to reconcile your tired adrenals, you’re required to stop caffeine altogether! (Reaching this point usually means coffee/ caffeine doesn’t have its usual kick to get you out of your slump anyway.) This topic is very familiar for me because, typically, I know that coffee is too much for my system. Depending on the day, it can even trigger an anxiety attack and the unfavorable shakes. I love the taste of coffee, particularly fair-trade organic options that are roasted evenly, so that they don’t harvest mold (a popular issue with coffee beans). I also try to find low-acid options, but even all of those upgrades still don’t change what coffee can do to your adrenals. For me, I start to see the effects of it on my face and, unfortunately, I’m the type of person who sometimes requires signs of visible distress in order to finally put a stop to unsupportive behaviors. So, the alternatives! Weirdly enough, most people respond much differently to the caffeine found in tea. Some of this has to do with the fact that different types of tea contain different volumes of caffeine (some herbal is caffeine free, white tea usually contains the least, green tea lies in the middle, and black tea yields the highest amount of caffeine, along with green matcha). Also, caffeine has a variety of different strains so, some can be more steadily processed by the body. (Bulletproof coffee claims to have that as one of its perks...not causing you to peak and crash.) Experimenting with different teas can have a variety of perks. Most boast loads of health benefits and you’re able to access your inner medicine woman, seeking certain types for your particular ailments. During my sister’s pregnancy, I found a way to amp her protein intake (my mom says it’s so important because you’re building a baby brain) by making her hemp mylk lattes with an assortment of different herbal teas. It’s super simple and so delicious. Hemp is an amazing source of protein, containing a whopping 10 grams per tablespoon! That’s about as much as a large hard boiled egg. Hemp also contains the oh-so-healing omega-3 fatty acids, along with fiber and other vitamins and minerals. To make a hemp mylk latte, your first step is to brew a cup of tea...I like to steep mine a little longer since you’ll be dilluting it with the mylk. In a blender, add a tablespoon of hemp seeds to approximately 1/4 cup of hot water. I like to add pure stevia (like Sweet Leaf) or a little bit of raw, organic, local honey. If you have vanilla bean, cinnamon, collagen protein, or any other health boosters, those are great add-ons too! Last, BLEND. (It also works to pour your brewed tea with the desired ingredients and blend, but you just want to make sure all of the little hemp seeds are blended fully to reach the desired smooth/ creamy consistency.) Once it’s complete, this tea even has a nice froth to it so, you’re not missing a thing! Another great option is a blended, chilled matcha latte shown below! Not only is matcha delicious, it also comes with a barrel of health benefits! Note: I DO still drink coffee, but never more than 2 cups a day. I am also very careful to take an inventory of how I’m feeling and what I’m taking on that day. If it’s a particularly stressful time, I just avoid it. I also never drink coffee before a flight or speaking engagements because those already make me nervous so, pouring some adrenaline on that would not be supportive! Living in LA and being pretty plugged in to all things "wellness", I have the fun opportunity come across some PRETTY unique health trends! (Food, drink, cleanses, shots, diets, detoxes...you name it.) Many of them are great in theory, BUT they can also be tedious and/or very pricey!
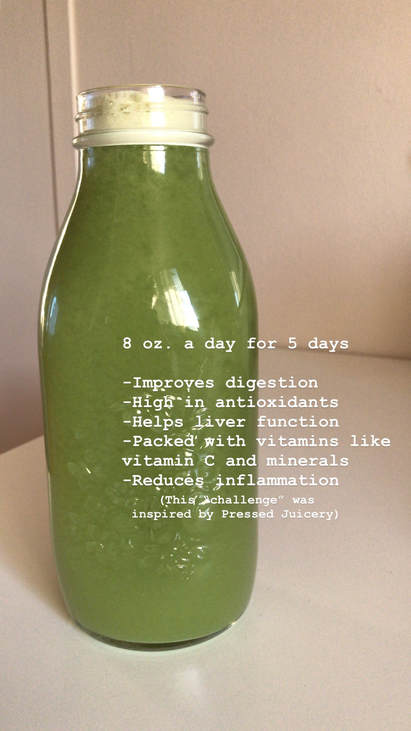
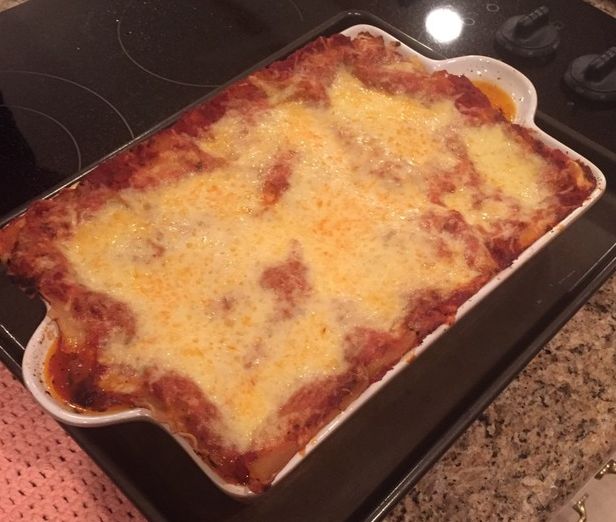
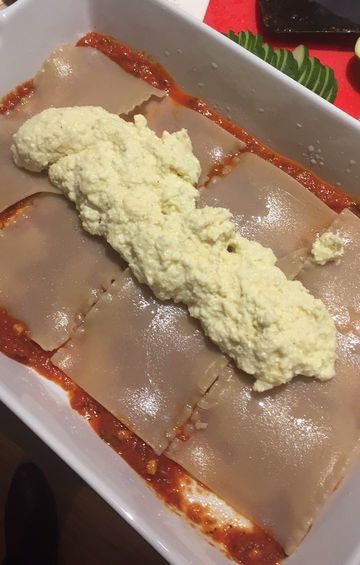
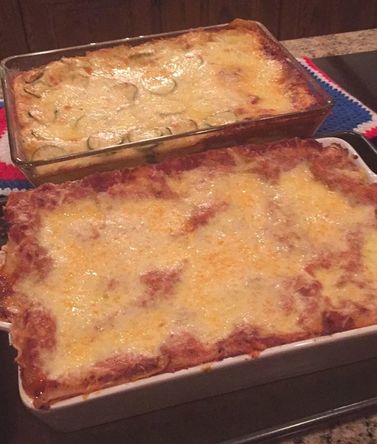
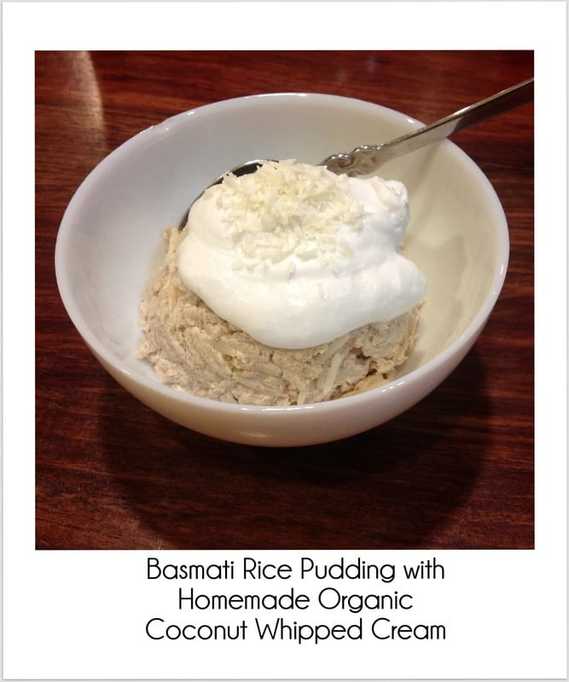
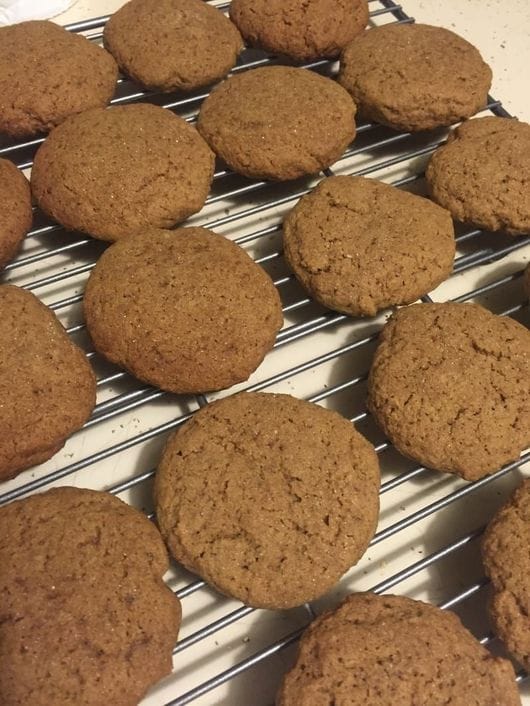
Recently, I noticed a special for a celery juice detox at Pressed Juicery. If you're unfamiliar with Pressed, it was definitely responsible for creating the re-emergence of the juice trend. In 2010, they created a very successful business offering a variety of body-boosting juices and shots, also offering a delivery subscription service to locals. While I love Pressed Juicery, I don't personally subscribe to their juice delivery/ pick-up. On one hand, I LOVE them because they are responsible for also creating my very favorite lifestyle website for the past 6 years, The Chalkboard Mag. This website sparked something inside of me and led me to where I am now. Another pro about the company is that one of the owners also graduated from my school, IIN! Why I don't personally buy their subscription service for juices is because it can be quite pricey and, unfortunately, the produce isn't organic. Now that the back story is out of the way... Even though I am a huge fan of making celery-based soups, knowing their amazing detoxifying powers, I kind of thought the only reason for marketing JUST celery juice could really only be a smart business move/ margin builder because celery is SO inexpensive, EVEN organic. So, I decided to do a little more research and there is a reason why it's so effective...even just containing one super veggie! I've said it before, but since I don't think it's worth the time re-writing what's already been well written, HERE are the full list of benefits from one of my favorite health sources! Not only have I enjoyed this morning ritual and feel truly amazing by doing so (clearer skin, more energy, flat stomach), I have now gotten quite a few people on this bandwagon who have expressed experiencing benefits including: increased clarity, relief from achy joints, quickly reduced cold symptoms, more effective elimination, etc. So, if you've been considering implementing a new form of self-care, consider giving this one a shot! They say try it for 5-7 days to really benefit, but many who start don't want to stop! Really, the only rule is try drinking it in the morning, on an empty stomach, so that you can reap the full alkalizing benefits. If you don't have a juicer, you can also chop the celery and add to a blender and strain through a fine mesh strainer or cheese cloth (to reduce the fibrous pulp). IF you do decide to give this a try, please share your questions and/or experience in the comments below! It has been QUITE sometime since I posted a recipe so, I will be making up for lost time by posting TWO! My intention was to have my travel/ restaurant reviews up and running (since I was eating out more than eating in during my travel season), but I'm not going lie-- I am a little overwhelmed by all of the content I need to organize! So, in the meantime, here is a simple green soup I made up one day and it turned out pretty great. (Yay for beginner's luck.) Happy tip: I ended up storing half of this batch in an airtight container, freezing it, and recently thawed it out after months and it tasted just as good as the first day I made it! I try to bring my lunch to work as often as possible and because microwaves aren't a personal option for me, I needed something I could enjoy chilled. (Microwaves emit radiation into your food and reduce the amount of nutrients. For more science that is beyond my scope of knowledge and vocabulary click here.) So, not only was this soup a great lunch solution-- so is my Quinoa Kale salad! This is a recipe I've made countless times for my Radiance Refinery workshops and parties I've been to-- so, it's become a popular one. Like I mention in the video, it's really versatile and fun to switch up your ingredients adding ingredients like peaches, apples, nuts, peppers, feta, etc. To create even more of a crowd pleaser, divide your quinoa in two to three bowls and create a variety of salads for people to compare and enjoy! *Added note: I am famous for creating meals without measuring ingredients! This is one of the major reasons why I don't post more recipes, BUT I assure you, you can't really mess up these dishes! When it comes to the veggies, I basically add more of something based on my current taste preference, what I have in my fridge, and/or if I'm needing a specific vitamin! I'll add more spices depending on if I'm wanting more of a healing effect-- if you're sick or experiencing pain, load up on the anti-inflammatory spices! If you're feeling a little acidic, maybe reduce the amount of salt. Just smell and taste as you go and you really can't go wrong! While living in LA, one of my very favorite grounding foods was the lasagna at restaurant called Maggiano's. Well, as I usually mention in these recipe posts, while I loved it, once I changed my eating habits, I knew I wouldn't be eating that lasagna again UNLESS I revamped the recipe in a pretty big way! Luckily, I found their recipe, cleaned up the ingredients, made it gluten-free, tweaked measurements (actually removing a lot of cheese), and decided to cook it three years ago for Christmas dinner. Since it was so well received, I've made it each year since, gradually refining bit by bit to create this crowd pleaser CLEAN lasagna. In this ingredients list, I prefer to select all organic, non-GMO options! When it comes to dairy/ animal products, it's especially important to choose antibiotic-free, grass-fed, organic, and non-GMO...if and when possible! While this recipe isn't necessarily "healthy", by improving the quality of the ingredients, you are removing a lot of detrimental additives. Ingredients: For the Filling: - 4 whole eggs - 1 cup parmesan cheese - 32 oz. ricotta cheese - 1/2 cup brown rice flour - 1-1/2 tsp pink salt or sea salt - 1/2 tsp black pepper - 1-1/2 tsp finely minced garlic OR 1 tsp granulated garlic Cooking Instructions: 1. In a large bowl, add the eggs, parmesan cheese, ricotta cheese, and garlic. 2. Mix well with a whisk. Add the flour, salt, and pepper. Mix until completely incorporated. 3. Scrape down the sides of bowl-- mix again. 4. Use immediately or refrigerate. Assembly: - One 9 oz. box of brown rice lasagna noodles, I prefer Jovial! - Lasagna filling (above recipe) - Two 25 oz. jars of marinara sauce, I prefer Mezetta's Roasted Garlic and Caramelized Onion, but Jovial's is good too. - One 16 oz. bag of Italian Blend shredded cheese OR 1-1/2 cups of mozzarella, provolone, romano & parmesan cheese. - 1 lb. of grass-fed ground beef, browned Cooking Instructions: 1. Boil lasagna noodles for 4 minutes prior to assembly. (Don't cook any longer to avoid mush!) 2. Using a rubber spatula, spread 1/2 cup marinara sauce on bottom of baking dish. Lay a layer of lasagna pasta over sauce. (If using traditional lasagna dish or casserole dish, it ends up being approx. 4 lasagna sheets per layer. If needed, cut sheets to fit space) Approx dish sizes: 10" x 16" or 13" x 9". 3. Spread filling evenly over pasta with spatula. Then, evenly distribute the 1 lb. of browned (cooked) ground beef. Place another layer of pasta sheets on top, then spread 1/2 cup marinara. 4. Repeat this process until you reach 3 layers of noodles. Two layers of filling. The top of the lasagna should be a layer of noodles with another 1/2 cup of marinara on top. 5. Cover lasagna with a layer of plastic wrap and a layer of aluminum foil, if storing over night. If cooking right away, cover the baking dish with aluminum foil and bake lasagna in preheated oven set to 350 degrees. 6. Cook lasagna for approx. 40-45 minutes. Then, spread 16 oz. of Italian Blend shredded cheese on top. Cook for additional 15 minutes, or until golden. *Optional: add sliced zucchini to layers (shown below) Enjoy!!! Christmas just wouldn't be Christmas without a little tradition and FOOD! One of the most common things I hear this time of year from clients is that they sort of see December as a "cheat" month because people gift them with goodies, they have their traditions, and/or they feel the need to accommodate their family. While I can understand these justifications, it honestly is just a tragedy to think that people will practically destroy their hard work and health by falling "victim" to tradition, family, and food! I'm sure "tragedy" seems a little dramatic, but if someone uses this type of justified thinking during the holidays, they're probably going to use it every holiday, family gathering, or in times of stress-- and it is MORE than unnecessary considering the vast options out there! Recreating traditional recipes or craving whims is one of my favorite things to do because you're honestly not missing out. Not only do you get satiate that craving by getting partake in the tradition of still eating xyz, you also get that bonus satisfaction from the fact that you're not eating foods that make you susceptible to weight gain, illness, inflammation, and disease. I realize how good "conventional" holiday treats can taste, but at the end of the day, it really and truly is so much more about the emotions that food evokes than the actual food itself. It's a placebo effect. Daily, people are putting their life on the line (quality and longevity) for what? FLEETING moments of bliss and/or mindless eating. Because? As humans, we just want to feel good. So, if it means grabbing fast-food or eating Christmas cookies, we think it's worth it at the time because, again, we just want to feel good. But what we don't stop and realize is that food is just a short-term patch. A patch that will last an hour or so...until we feel back to where we started, OR worse because we're feeling guilty about what we just ate. I just challenge you to go to the source of your discomfort, pain, or sense of dull and see what it's REALLY about. Usually, in my program, we touch on "Primary Foods": relationships, career, home environment, creativity, spirituality, finances, etc. These are the things that give us our primary source of energy, not food. When we're high on life and full of soul-food, ingestible food becomes an afterthought. SO, try thinking of ways you can elevate your sense of self without food-- realizing that we've built an emotional relationship with food that usually never ends well. TAKE YOUR POWER BACK. One way to do this? When you want some indulgence via food, opt for healthier options/ alternatives. Trust me, they're out there! I would also like to highlight that while it isn't always easy-- it's also isn't always hard! When I first started this change, I had moments of withdrawal, but, now, someone couldn't pay me to eat most conventional treats/ foods. I don't see value in it-- not only because I now see the light and know that you can eat healthy AND delicious at the same time, but because that food just isn't appetizing when I know the harm it could have on my body, energy, and mental health....and what it's really made of. (Hint: it has just about as much real food in it and/or health benefits as eating a Christmas ornament.) IF you would like some support and assistance in making this transformational transition, contact me for a complimentary 45-minute consultation....now, ENJOY THE RECIPES BELOW! Basmati Rice PuddingThis is by far one of my favorite new food traditions! I do suggest making double because it's amazing right out of the oven AND eaten chilled the next day for breakfast...SO good. (The video above is from my Instagram story I recently posted.) Ingredients: - 2 cups water - ½ tsp sea salt - 1 cup white basmati rice (rice with the lowest GI) - 1 - 14 oz. can organic coconut milk - 2 raw egg yolks only, beaten (the most nutritious part of the egg! Contrary to popular belief, studies show that yolks can actually lower your chance of heart disease!) - 3 Tbsp + 1 tsp lakanto, xylitol, erythritol, or brown coconut sugar - 1 tsp cinnamon - 1/2 tsp nutmeg - 1/4 cup shredded coconut, optional garnish. - for added "holiday" flavor, omit the 1 1/2 teaspoons of cinnamon and nutmeg and use 1 1/2 tsp of premixed pumpkin pie spice- or, just add allspice, cardamom, clove, etc. You can also add 1/2 tsp vanilla extract or Frontier's vanilla flavoring before baking. Instructions: To Cook Rice: In a medium saucepan bring 2 cups water to boil, cover, reduce heat to low, and cook 30 minutes until rice is tender. To Make Pudding: 1. Combine coconut milk, sweetener, egg, cinnamon, and nutmeg. 2. Combine liquid ingredients with cooked rice. Mix well. 3. Fold into a baking dish or casserole dish that has been coated evenly with quality butter or coconut oil. 4. Bake at 350 degrees for 25 - 30 minutes. 5. Serve warm or chilled! This dessert/ breakfast is delicious when topped with shredded coconut, berries, pumpkin seeds, and whipping cream, if desired. Whipped Cream Ingredients: - 1 can of organic coconut cream - 1 - 2 Tbsp of sweetener (optional) Instructions: 1. Using an electric mixer or hand help blender, whip cream and healthy sweetener of choice at highest speed until stiff peaks form (approximately 3 minutes). 2. Store in an airtight container for at least 4 hours (best overnight). Mini Egg CasserolesFor this easy crowd pleaser, measurements really all depend on how many people you're cooking for! My mom and I have separately made these a handful of times without an actual recipe and we've both eyed it and it came out pretty much the same. Ingredients - Eggs, organic and pasturized is best - Almond milk, unsweetened - Additions: chopped zucchini, spinach, bell pepper, onion, beef or turkey sausage, quality, goat cheese, tomato, shredded red skin potato-- really anything that you might desire in an omelet! Also, it's fun to have at least few different options to appeal to larger groups. Maybe one meatless and/or cheeseless. Instructions: 1. If you're using meat, onion, zucchini, bell pepper, or anything that takes a while to cook through, first, cook in a pan. I prefer sauteing onion, zucchini, and my peppers a little before baking to ensure that they're tender. Also, partially brown any meat before baking! 2. Mix all ingredients into a bowl. Add a splash of almond milk. For approx a dozen eggs, maybe 1/4-1/2 cup of almond milk. Add salt, pepper, etc. to taste preference. 3. Evenly pour into lightly oiled muffin tins (ghee, butter, olive oil) or paper liners (they do stick a bit to the paper, but it does make serving a little easier) 4. Bake at 375 for approx 18-20 minutes. Pairing suggestion: these taste great with piped whipped avocado! (Sort of like a frosting. You just blend avocado with a little bit of olive oil to make it smooth and creamy. Then, add the mixture to a ziplock bag with a tiny corner snipped.) Ginger CookiesThis recipe was a fun one to create because I have always had a LOVE for ginger cookies (especially the giant ones at Whole Foods), but in the persuit of eating foods that align with my body, I don't choose to eat gluten or refined cane sugar-- SO, this delicious cookie was created! Pairing suggestion: Hallmark Christmas movie ; )
Ingredients: - 3/4 cup organic palm oil shortening (Nutivia has a responsibly sourced option that doesn't harm the orangutan's natural habitat) - 3/4 cup packed brown coconut sugar - 1/4 cup amber coconut nectar (Big Tree is a good option) - 1 egg - 2 cups brown rice flour - 2 tsp baking soda - 1/4 tsp sea/pink salt - 1 tablespoon ground ginger - 1 tsp ground cinnamon - 1/2 tsp ground cloves or pumpkin pie spice - 1/8 cup xylitol (optional garnish) Instructions: 1. Preheat oven to 350. 2. In a large bowl, mix together shortening, brown sugar, and nectar. 3. Whisk in egg. Set aside. 4. In a large bowl, mix together dry ingredients (minus xylitol). 5. Add flour mixture to sugar mixture and blend until fully combined. 6. Shape dough in small balls (approx 1 1/2 inch...a little smaller than a golf ball) and gently press dough on a plate of scattered xylitol. 7. Transfer to baking sheet 1" apart. 8. Bake for 10-12 minutes. 9. Let cool for 5. Then, transfer to cooling rack. Seasons Greetings and Happy Eating! - Holly This Medicine Woman recipe is perfect for those of you who would like a holistic way out of a common cold, flu, minor aches, etc. This is MY flu shot. I can honestly say that I always experience major turnaround by drinking regular doses of this and my clients can verify it's magical powers.
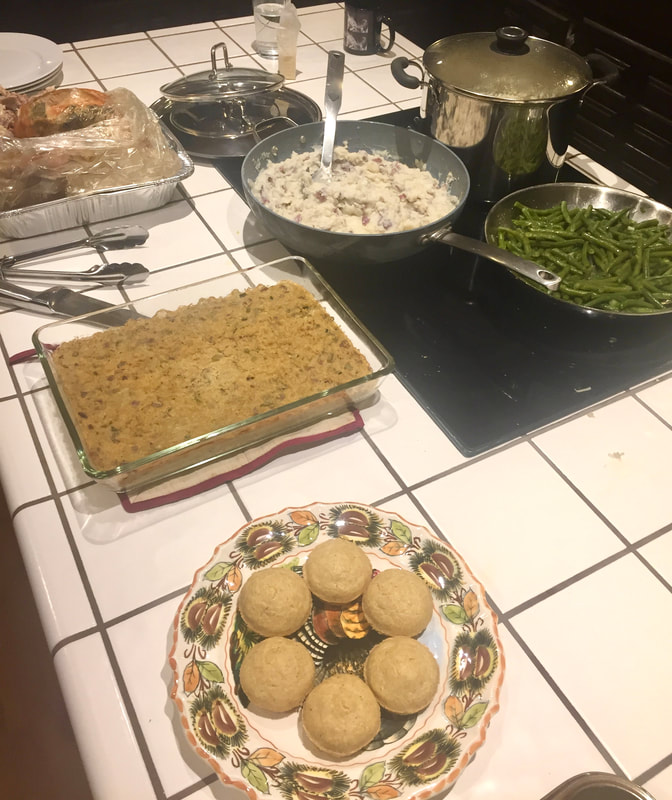
Most people don't realize that antibiotics are for bacterial infections- not viral infections! If you have a sick child and you know they won't drink this, use these seasonings (skip the cayenne for small children) and/or tea and mix it with a good quality broth (bone broth is best, but chicken or vegetable broth will do), veggies, and brown rice noodles! Last note: I know it's so tempting to self-soothe with treats (sugar, refined carbs, dairy), but know that not only will it delay your recovery, but will also contribute to infection, mucus, and inflammation! Yay vegetables! For those of you who missed my Clean Thanksgiving cooking demo at Natural Grocers, you haven't totally missed out! I am sharing my entire menu for this special holiday. I usually try a new recipe each year for kicks, but because we're having such a small gathering, I am sticking with the basics! Not only do I think Thanksgiving is a wonderful opportunity to share love with your family by cooking them a lovely meal, I also think it's an equally fabulous opportunity to think about what you are grateful for...or what you should start being grateful for. Read more to see the recipes for all of my holiday menu items! Also, take a look at this scary article to see what you're REALLY missing by eating a clean Thanksgiving! Hint: it's not flavor.
I have gone through quite a few carrot cake recipes over the years to come up with the perfect birthday cake for my lovely mother!
She has always been quite particular about her carrot cake, enthusiastically expressing that she doesn't want a "spice cake"...meaning, she wants actual carrots in the carrot cake AND a lot of walnuts! In my process of cleaning up recipes, I usually use Google to find a "traditional" recipe with good reviews and then, I make the necessary swaps. In this particular recipe's case, I used all organic ingredients, changed the oil, exchanged some oil for apple sauce, swapped the wheat flour for brown rice flour + tapioca flour, replaced the sugar with lower GI sweeteners, improved the quality of salt and butter, and for the sake of my beautiful mother-- amped up the amount of nuts and carrots! I hope you enjoy! Ingredients FOR THE CAKE 2 1/2 - 3 cups lightly packed, grated carrots (approx 4-6 carrots) 3/4 - 1 cup chopped walnuts, toasted (more for topping the cake if desired) 1 3/4 cups brown rice flour 1/4 cup tapioca flour 1 3/4 tsp. baking soda 3/4 tsp pink or sea salt 2 tsp. ground cinnamon 3/4 tsp. ground nutmeg 3/4 tsp. ground ginger 3/4 cup unsweetened apple sauce 1/4 cup coconut oil 4 large eggs, room temperature 1 1/2 cups brown coconut sugar 1 1/2 tsp pure vanilla extract or Frontier vanilla flavoring FOR THE FROSTING (I don't prefer a thick layer of frosting so, if you are someone who does, I would suggest doubling this recipe or doing an additional half.) 1 lb. organic cream cheese, softened 1/4 cup grass-fed, unsalted butter (1/2 stick), softened 3/4 cup xylitol, powdered (if you prefer, you can also use non-gmo erythritol or stevia. If using stevia, measure to taste...start at 1/2 tsp and you may want to double the recipe because it won't leave you with much frosting) 1 TBSP pure vanilla extract or Frontier vanilla flavoring 1/2 tsp pink or sea salt Instructions For Cake and Frosting
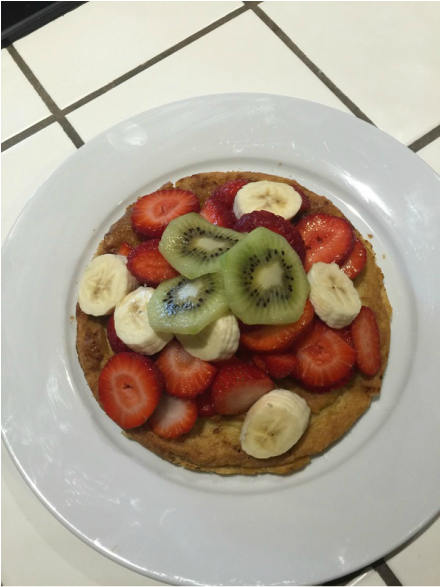
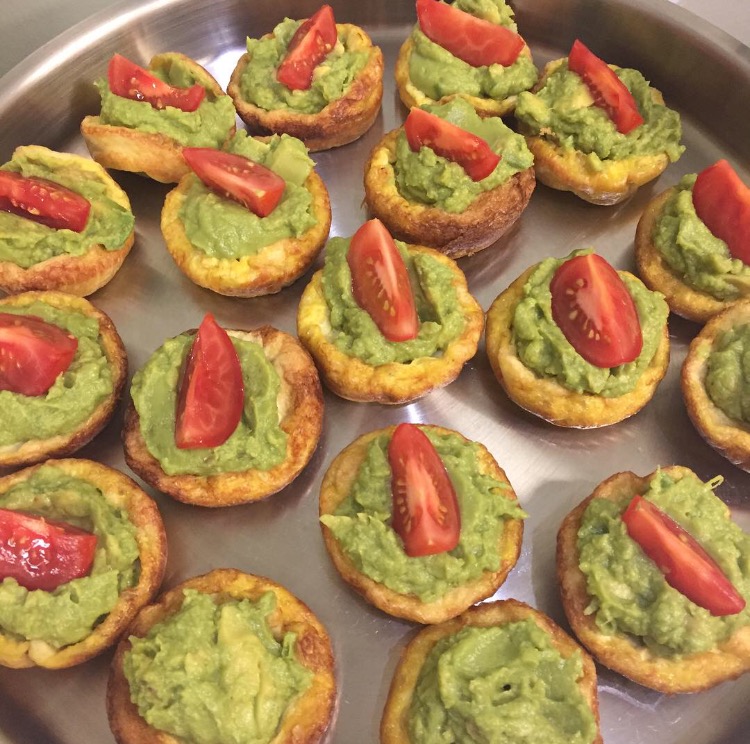
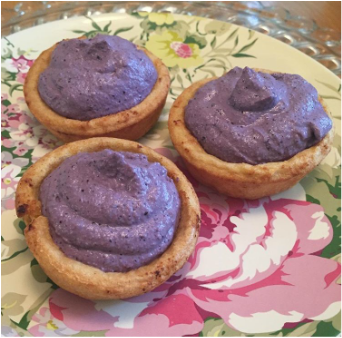
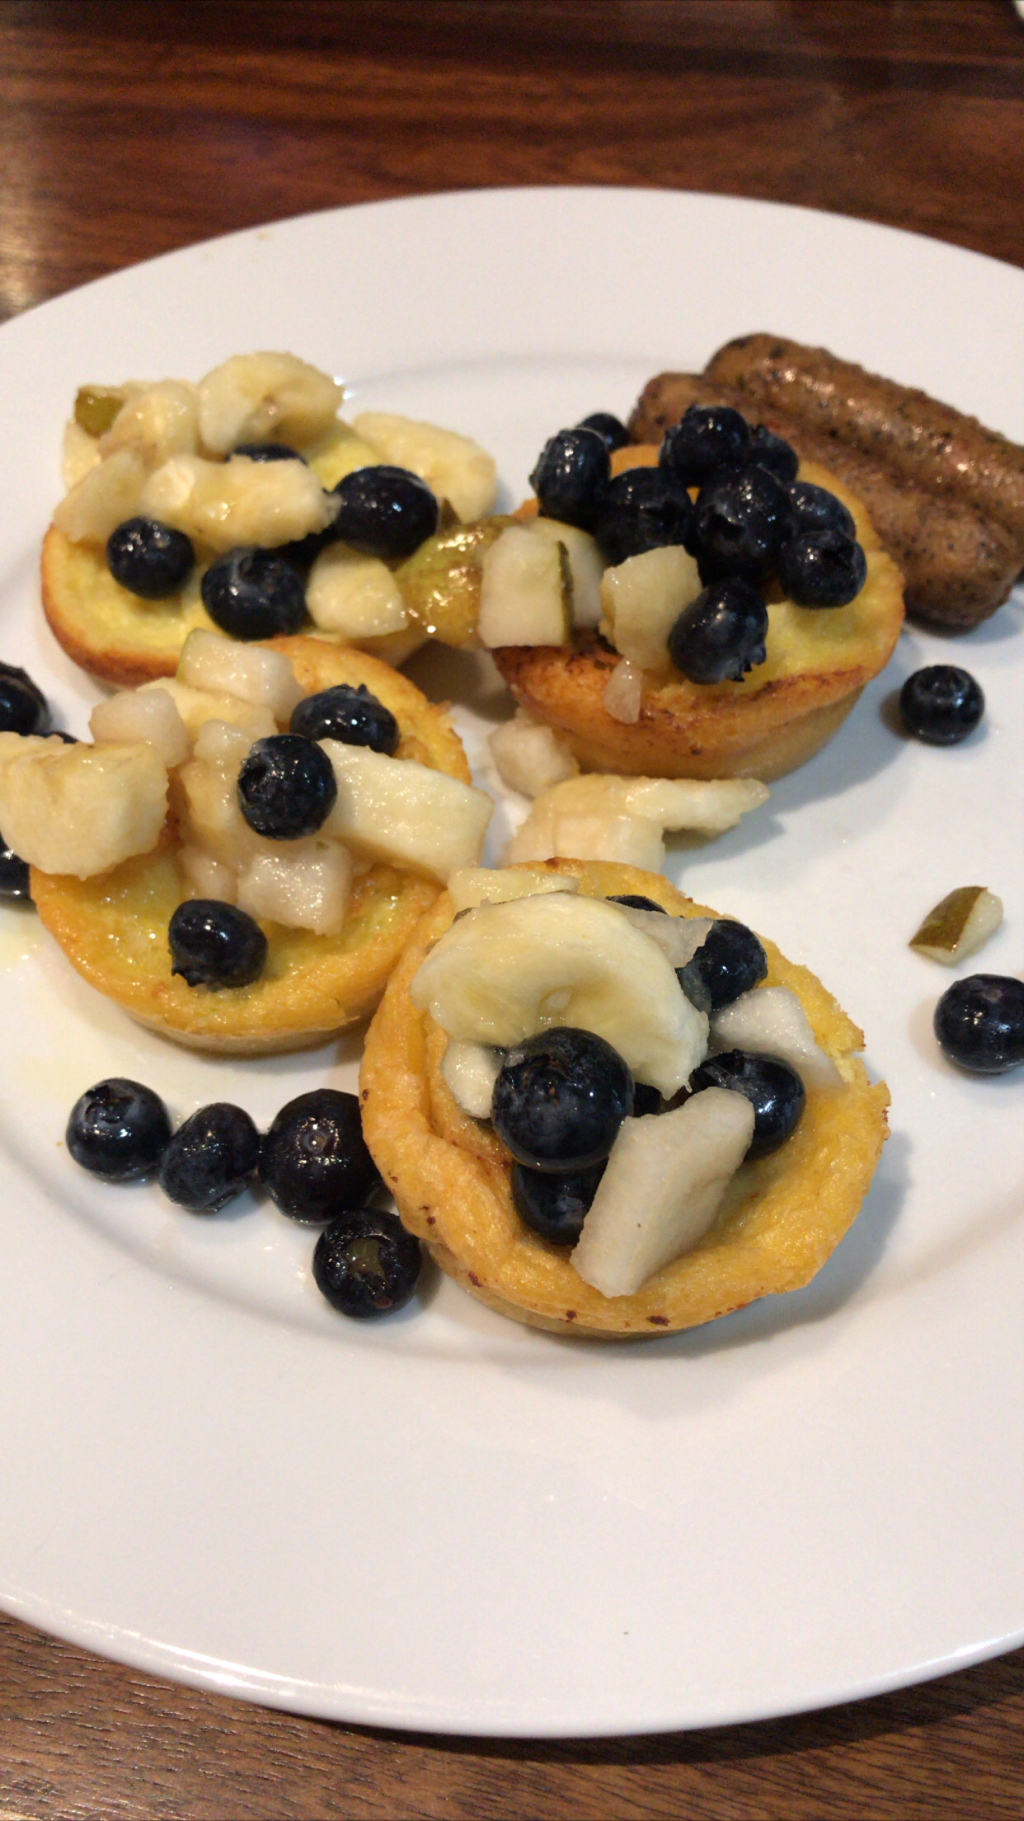
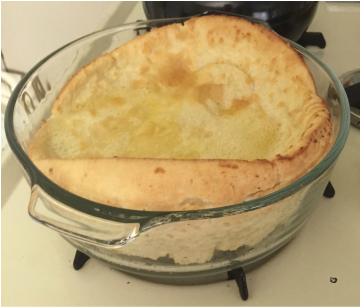
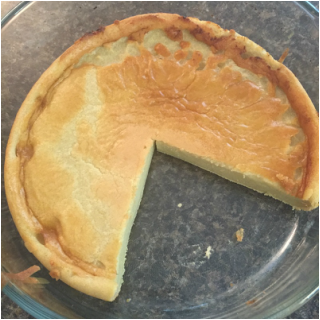
For those of you who missed my recent cooking tutorial at Natural Grocers, I shared one of my tried-and-true recipes my whole family has grown to love! This Dutch Baby/ German Pancake recipe is actually on of the very first recipes I learned in good ol' home ec class...except now, it's (obviously) my cleaned up, gluten-free version! This versatile dish is something I love to contribute to gatherings because A. It's easy, B. It's delicious, and C. It's super impressive looking and you don't have to invest much time or energy whatsoever! What makes this pancake different from most is that it's baked in the oven and it's primarily egg-- so, bonus protein. You can either create something beautiful family-style in a cast iron skillet or a pie pan-- OR, my favorite, in muffin tins for individual-sized cups. (You will see in my images the variety of versions.) Ingredients: - 1 1/4 cup grass-fed butter - 1 cup brown rice flour - 1 cup almond milk - 6 eggs, lightly beaten - 1/8 tsp of Himalayan or sea salt Preheat oven to 350 degrees. If you're using a skillet, pie pan, or baking dish, melt all of your butter in the oven while the oven is preheating. If you're using muffin/ cupcake tin, evenly distribute butter into each cup. This recipe usually will yield approx 24 cups. Note: Watch carefully because you don't want to brown your butter! Remove from oven just as soon as butter is liquefied. In a medium bowl, mix together all of your ingredients thoroughly. Tip: if you're choosing to make small cups, I suggest you pouring the mixed batter into something with a spout because it can get a little messy. Also important: only fill cups half way with batter! After pouring batter in pan(s), bake on the center rack in preheated oven for 30-40 minutes. For cups, approx 20 minutes, or until golden brown. My favorite serving suggestions- Savory: - Wild-caught smoked salmon with organic goat cream cheese. To get the piped appearance, I used softened cream cheese and a ziplock bag with the corner clipped. This tastes awesome alone or I've added fresh dill, capers, and sliced cherry tomato....it's also really pretty dressed up a little (picture shown above). - Guacamole with a halved or quartered cherry tomato (shown below). - Great brunch option the day after Thanksgiving. Take advantage of leftovers and fill with roasted turkey and cranberry dressing. Sweet: - Fruit of all kinds! Sauteed, compotes, fresh! - Cashew cream mixed with berries and stevia makes a lovely filling (shown below). - I also recently sauteed a bag of organic berries in a pan and added approx. 1 1/2 cups of water, a little bit of Frontier vanilla flavoring, some stevia, and kept adding the chia seed until it thickened into a berry jam, while continuing to cook on a low simmer. Not only did this taste awesome warm, but after I stored it in a jar in the fridge overnight, I could eat it alone with a spoon! So satisfying. You may be thinking, "that is a lot of butter!" and yes, it is. As you will see below, if you don't add that much butter, the pancake won't rise and curl into the right shape. It still tastes awesome when you omit some of the butter, but you won't get the bowl/cup-like appearance. It will be a little more dense and flat, as you can see seen in some of the pictures!
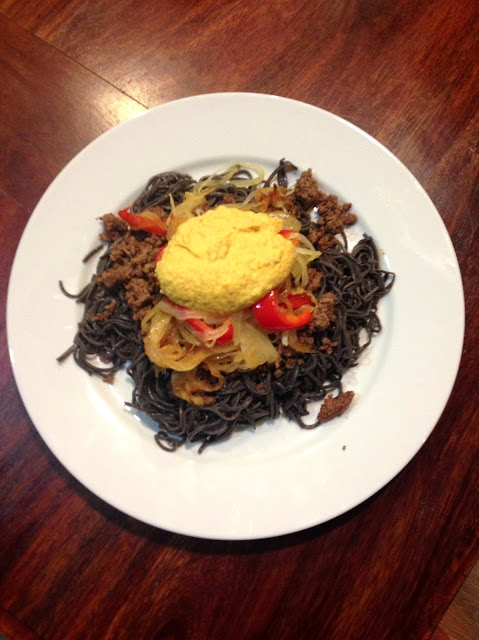
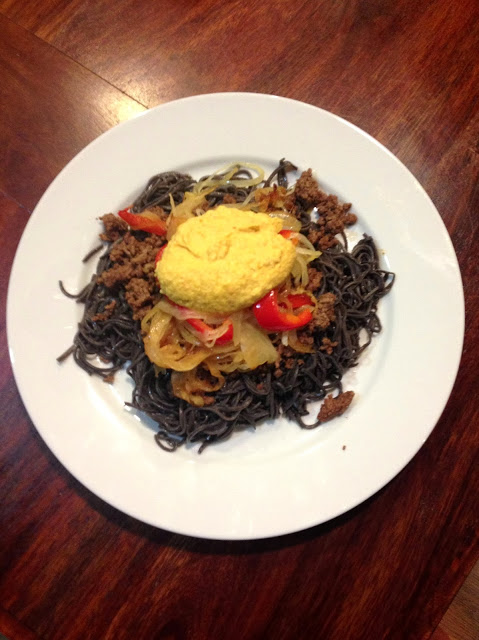
For those of you who had to miss my cooking demo at Natural Grocers recently, here are the recipes I went over and a fun article about the mood-boosting benefits of cashews. For all of these recipes, minus Parmesan Cheese, you need to soak the raw cashews first. Not only does soaking insure a creamier texture, all nuts (and seeds and grains) are usually difficult for most people to digest because of an enzyme-inhibiting substance in them called phytic acid. ("Enzyme inhibitors" = enzymes secreted during digestion can't do their job because they can't properly break down the food.) Phytic acid actually impairs your body's ability to absorb certain vitamins/ minerals so, by soaking them, you are able to reduce that effect and reap more of the health benefits of nuts because your body is able to assimilate the nutrients better. To soak them, simply cover them with purified water in a glass or stainless steel container overnight for 8-12 hours. You can then drain and refrigerate them, but you need to utilize them within approx 48 hours to avoid mold. If you don't utilize all of your soaked nuts or would like to consume dried nuts in a healthier way, dehydrate them in the oven set on low for 8-10 hours, Nacho Cheese - 1 cup, soaked, raw cashews (soaked in water for 4-6 hours, or overnight, and drained) - 1/4 cup, chopped red bell pepper - 2 tablespoons, extra virgin olive oil (organic is best) - 2 tablespoons, water - 1 1/2 tablespoons, lemon juice - 1/2 teaspoon, sea salt or pink salt - 1/2 teaspoon, turmeric powder - 1 teaspoon, onion powder Add cashews, chopped bell pepper, water, lemon juice, and olive oil to food processor. Blend on high until all ingredients are fully blended. Then, add seasoning and blend until mixture reaches a smooth and creamy consistency. You can store in an airtight container for up to 7 days! (One of my favorite ways to enjoy this, shown in the pic above, is using it to top off my "Mexican Spaghetti" - black bean noodles, sauteed veggies, and taco seasoned grass-fed ground beef. Or, more simple & vegan option, using it in a black bean, pico de gallo, fajita veggie layered dip.) Sour Cream - 1 1/2 cups, soaked raw cashews (soaked in water for 4-6 hours, or overnight, and drained) - 1/2 teaspoon, sea salt or pink salt - 2-2 1/2 teaspoons, lemon juice - 3/4 cup, water Add all ingredients to food processor and blend until smooth and creamy. (This recipe is great because it has all sort of potential! One of my favorites: add green chilies, tomato, lime juice, and/or cilantro for a delicious enchilada sauce or to top off a taco salad. Another option is to omit the salt in the recipe and create your own creamy dessert. One option: add berries, vanilla, and stevia for a sweet, mood-boosting treat.) Parmesan Cheese - 1/3 cup, raw, dry cashews - 1/4 teaspoon, mustard powder - 1/4 teaspoon, sea salt or pink salt - 1/4 teaspoon, fennel seeds Finely blend all ingredients until mixture reaches a parmesan cheese texture. This one is best blended in a coffee grinder or something that can powder the fennel seed. Store in an airtight container for up to a month. Key Lime Cream - 1 cup, soaked raw cashews (same as other soaked recipes above) - 3/4 cup, organic unsweetened coconut milk, shaken. (I prefer the full-fat version vs. reduced-fat because it reaches a thicker consistency and it's a good fat!) - 1/4 cup, melted coconut oil (organic extra-virgin, raw is best!) - 3-4 limes, 3 is okay if they're large. - 1/2 cup, xylitol, powdered. Simply put granulated xylitol in a blender/ coffee grinder/ or small food processor and pulse until it reaches a "powder" consistency. First, roll limes around counter to help release juice. Then, grate 2-3 limes for zest before juicing. Juice the limes and set aside. Add all ingredients to food processor and blend until smooth and creamy. Pour/scoop mixture into a muffin tin, lined with baking cups. Top with lime zest. Freeze for 2-4 hours. Remove for 10 minutes to thaw before serving. Store for up to 2 weeks. If you try one of these recipes, please post in the comments section! Want to be in-the-know about my latest cooking demo schedule and complimentary grocery tours? Sign up for my newsletter below! Repost from February 2015
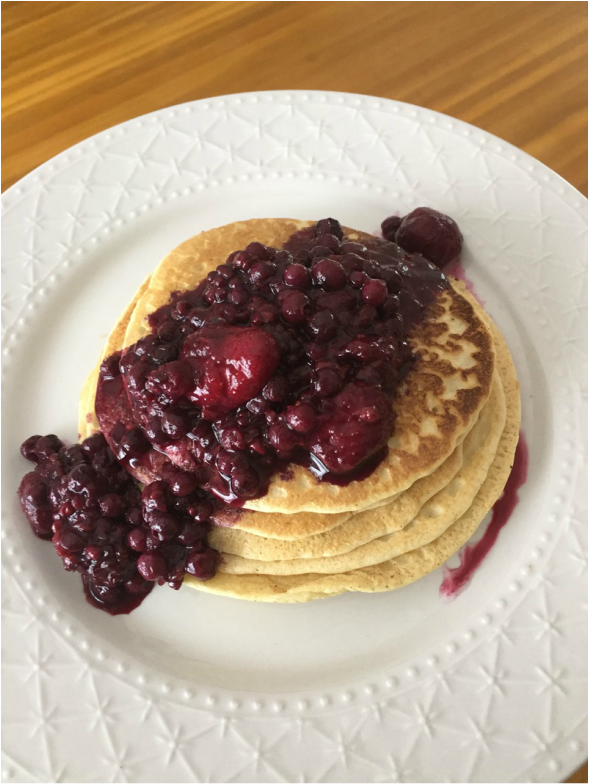
The moment I saw more snow start to fall this evening, I decided my clean PANCAKES would be the perfect thing to warm my soul! This recipe took me quite some time to master...and since they make me SO happy, I thought I should spread the love and share my "top secret", EASY recipe! Doesn't hurt that they're gluten free, sugar free, gluten free, dairy free, right? The one thing I want in exchange for this recipe: please make sure you do these clean pancakes justice and use a healthy topping! See below recipe for serving suggestions. Ingredients: I used all organic. It isn't necessary but it is more than ideal! Yields approx. 6 pancakes - 3/4 cup brown rice flour - 1 3/4 teaspoons baking powder - 1/2 teaspoon pink salt - 1 cup almond milk, unsweetened. (If not homemade, my favorite is Pure Almond Milk.) - 1 tablespoon lakanto (pure monk fruit), xylitol, erythritol, or one Sweet Leaf stevia packet. I usually use stevia or mix half brown lakanto and half xylitol but they're all good sugar replacement options! - 1 egg - Extra-virgin coconut oil, to grease pan * Optional: 1-2 teaspoons alcohol-free vanilla extract and/or cinnamon Mix all dry ingredients together. Add milk and egg and whisk until smooth. Add a little bit of coconut oil to pan. Warm pan on medium-low to medium heat. Once the pan is warmed, pour batter, as usual! Once the edges are smooth and center is bubbly, flip! Serving Suggestions My favorite topping options: - I love the convenient bags of organic frozen berries at the grocery (mixed berries, blueberries, or strawberries). Simply cover the bottom of a pan with a bit of water, add frozen fruit, and sauté on medium-high heat, until most of the water is gone. * Optional step: To thicken the juice, add 1 tablespoon of Bulletproof's Collagelatin Collagelatin supports rapid repair of tissues and bones, helps support joint mobility and smooth, healthy skin! It becomes gelatinous in cooled liquids, mixes easily in hot liquids, and is great to use to thicken sauces. You can enjoy this warm, but if you let it chill, it will become a jam-like consistency. Other favs: - Peeled, chopped, baked green apples with cinnamon, allspice, nutmeg...and chopped walnuts are a nice addition. - Fresh berries are great if you want to add them to your batter and bake them into the pancakes. - Add walnuts, organic/ grass-fed butter, cinnamon & spice, and lakanto in a pan. Sauté on medium heat until mixture becomes thickened, for a "nut roll-esque" pancake. - Grass-fed butter with cinnamon and a little more of the sweetener. Simple but delicious. - Almond butter (unsweetened) with any/all of the following: chia seeds, shredded coconut, pure cacao powder, one of the 3 sugar alternatives listed in recipe. - Sweetened and spiced pumpkin puree. ....I could go on and on for days! Happy and healthy eating! - Holly I have consistently had the struggle to keep it all together. Not that keeping it all together is even really possible. There's this wonderful quote I recently heard saying something like "even the person who has all of their shit together is still standing in it". Nonetheless, keeping it together has always been something I strived for. This term, in short, pretty much means keeping up appearances, consistently. It also means having more days when you, your home, your car, habits, and routine look polished, well-oiled, and productive and less days when you look and live like a slob kabob. It's not so much for vanity's sake but I truly believe that once you routinely incorporate the steps it takes to "keep it together", (the same steps that also just so happen to result in a visibly pleasing outcome), you show up in life with your best foot forward...boldly and enthusiastically. That type of energy attracts all sorts of wonderful and then, the domino effect commences! Once you master one thing, you're more likely to be mindful of another, and since that feels so good, why not add a few other feel-good accomplishments to the pile?! I am lucky enough to have a handful of fabulous friends. This group of people, like me, regularly discusses how they need to get back into their gym routine, or they need to get some color on their skin, or they need to make a habit of a spiritual practice: church, meditation, etc! We all have some pretty hectic schedules...especially compared to what it was like in high school. Living in the grown up world of consistent jobs, errands, bills, and priorities that keep the lights on and a roof over our heads takes up a majority of our adult day. While we can't walk away from those necessary priorities, or "adulting", we can make sure we still give ourselves the attention we deserve. Yes, life gets hectic but in the grand scheme of things, if you're too busy working your ass off, it's not that you can't afford to master self-care, but, really, you can't afford to not to master self-care. A chance to recoup and honor yourself with some daily love is as valuable as it gets. What is all of that hard work really for if you don't enjoy your everday? Time is precious, yes, but I think serving yourself a nice, hot slice of "you" time on the daily will not only have an impact on your happiness, but, also, your income! Those daily treats, in the long run, can make you even more productive because of that wonderful sense of clarity that comes with regulated cortisol (the stress hormone). So, my idea. This year, I am going to debut a new blog series called 365 Days of Self-Care: How to Make 2016 Your Bitch. (I apologize if profanity offends anyone but the title made me laugh too hard not to use it.) This series will focus on the many forms of self-care that you can treat yourself with on the daily. I have gathered the consensus that many people have massive reservations about making resolutions because they don't want to set themselves up for failure. I get it. You've set these goals before and end up feeling defeated before the end of January. I've been there too. With this series, you're not setting yourself up for any realm of failure because you can incorporate one form of daily TLC that will take you very little time and will contribute to your bigger picture...you becoming even more awesome! To be honest, I am looking forward to this as a form of accountability. I have mastered clean eating & listening to my body, I am in the ever-evolving process of honoring myself, and now, I would like to treat myself like I deserve to be treated via pampering, love, and FUN! So, please join me in this pursuit! Expect a lot of embarrassing videos, exciting tutorials, hopefully some pounds shed, stress melted, healthy habits adopted, and delicious recipes tasted! Can't wait! Want to be all in? Sign up below for my monthly newsletter that's packed with lifestyle tips, recipes, and positive support! *photo cred TTFMag A few years ago, I was feeling rather festive, which quickly resulted in my having a massive craving for pumpkin pie. I do have an incredible gluten free, refined sugar free, soy free, dairy free, etc., etc. pumpkin pie that I will for sure eventually share, BUT I was sort of wanting more immediate gratification! Update: click here for my pumpkin pie recipe!
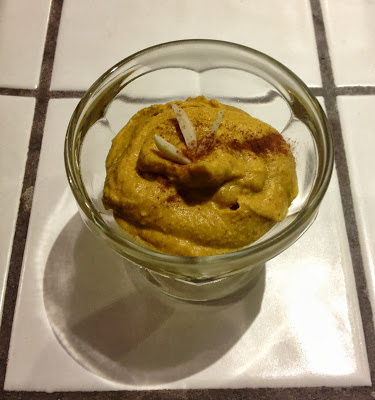
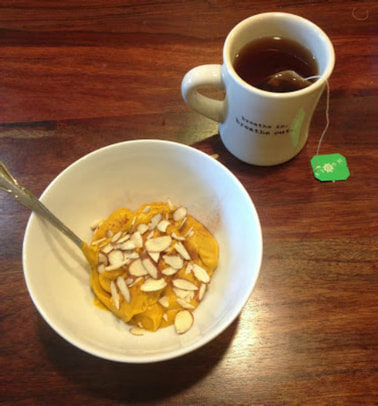
So, I crossed my fingers and whipped up (literally) a fantastic raw, vegan, treat that more than sufficed for a quick pumpkin pie-like treat! Since almonds are used to make a delicious milk alternative, it makes a lot of sense that this would create a sweet, milky/ creamy flavor. Added bonus: it took 2 minutes to make! This treat does taste better after being chilled in the fridge. What you will need: - One 15 oz. can of pumpkin. (I use organic Farmer's Market brand because the can has a BPA free liner. Available at Whole Foods.) - 1/3 cup almonds, chopped. (It's best if you soak them in water overnight to remove enzyme inhibitors and to soften them so that you reach a creamier consistency.) - 2 1/2-3 tablespoons brown Lakanto (other options are xylitol or organic brown coconut sugar) - 2 teaspoons pumpkin pie seasoning blend. (I love, love this pre-mixed spice of cinnamon, ginger, lemon peel, nutmeg, cloves, cardamom, star anise, fennel, and black pepper. You can find this with the spices at almost any grocery. It also tastes wonderful in quinoa, paired with a natural sweetener.) - 1/2 tablespoon vanilla extract, preferably alcohol free. - 1 tablespoon water What to do! - Add drained almonds and 1 T of water to a food processor (I used my Vitamix for this). - After the almonds are blended into a paste, add pumpkin, sweetener, vanilla, and seasoning. - Blend until smooth. - Top with a sprinkle of cinnamon and/or almonds for garnish. ENJOY! I really enjoyed it with a hot cup of chai tea. Although, I love tea with almost everything. Good news: this is one of those sweet treats you can enjoy for breakfast and not feel the least bit guilty! This dish is packed with potassium, vitamins A and C, protein, and if you were as happy as I was after eating, it also has a mood boosting effect! *I actually just read that pumpkin boosts serotonin, which is said to give you a more positive outlook. Just as soon as I start seeing upcoming fall fashion in magazines, my head immediately goes to crisp, cool weather, and takes a sharp turn to the state FAIR! Growing up, the fair was something I looked forward to all year long. Was it the rides, pop-up shops in the expo, or live music? Nope, it was the food. All of the deep fried "goodness" the U.S. had to offer. Not only did I become fond of the Tulsa State Fair, I also was able to experience the Orange County Fair when I lived in LA, and the Texas State Fair when I lived in Dallas. Of course, there was inevitably a list of new concoctions to try, but the always classic corn dog was my mandatory indulgence.
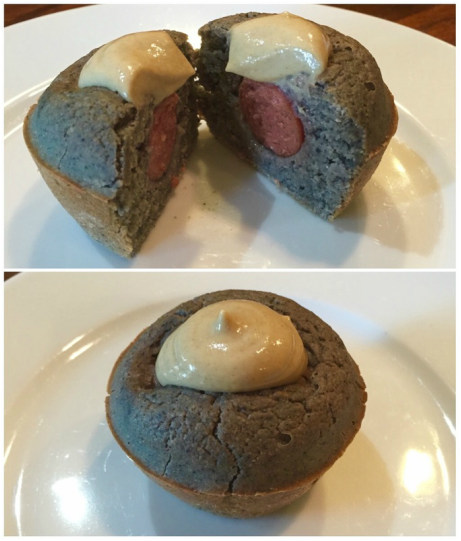
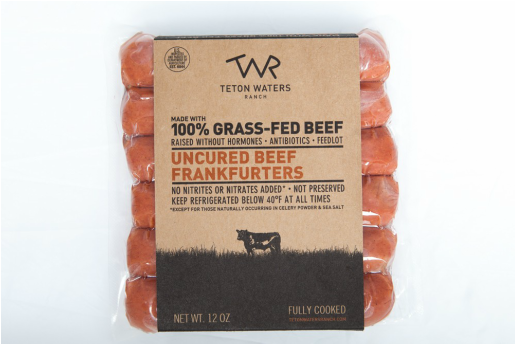
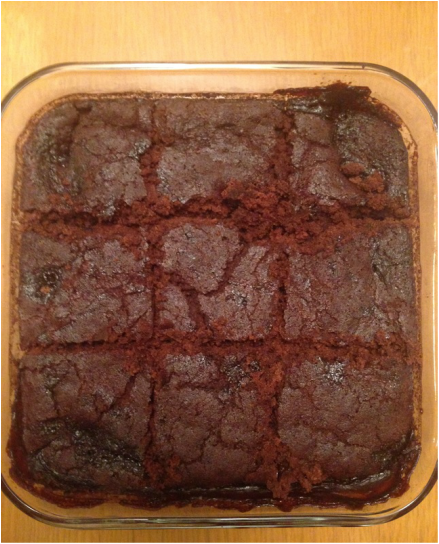
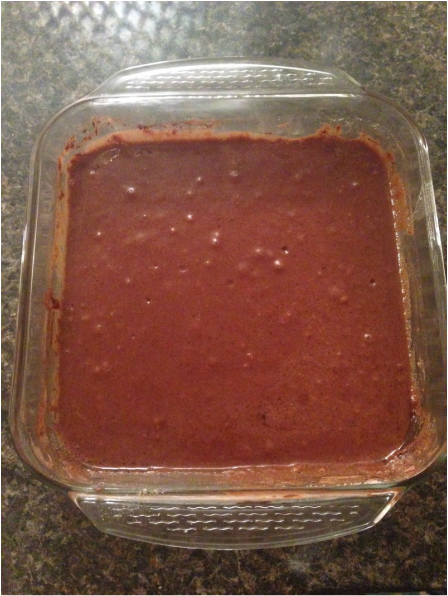
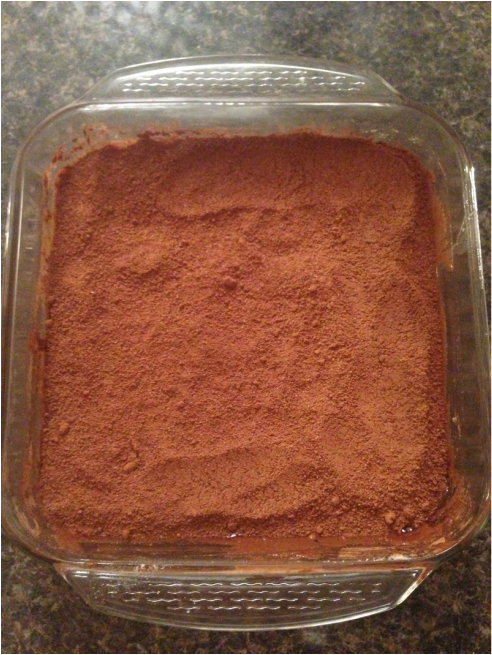
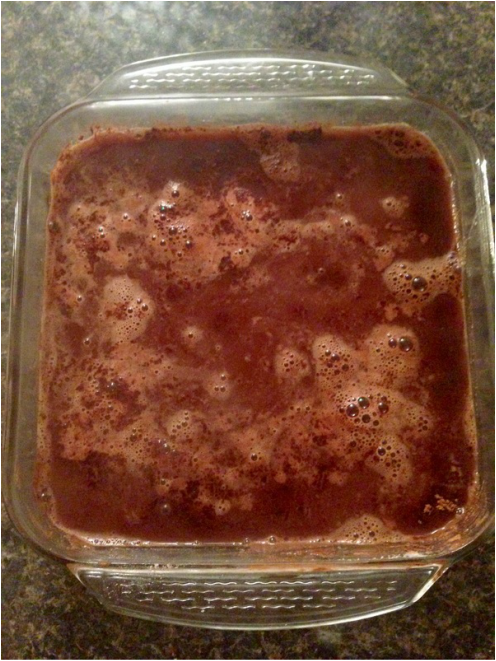
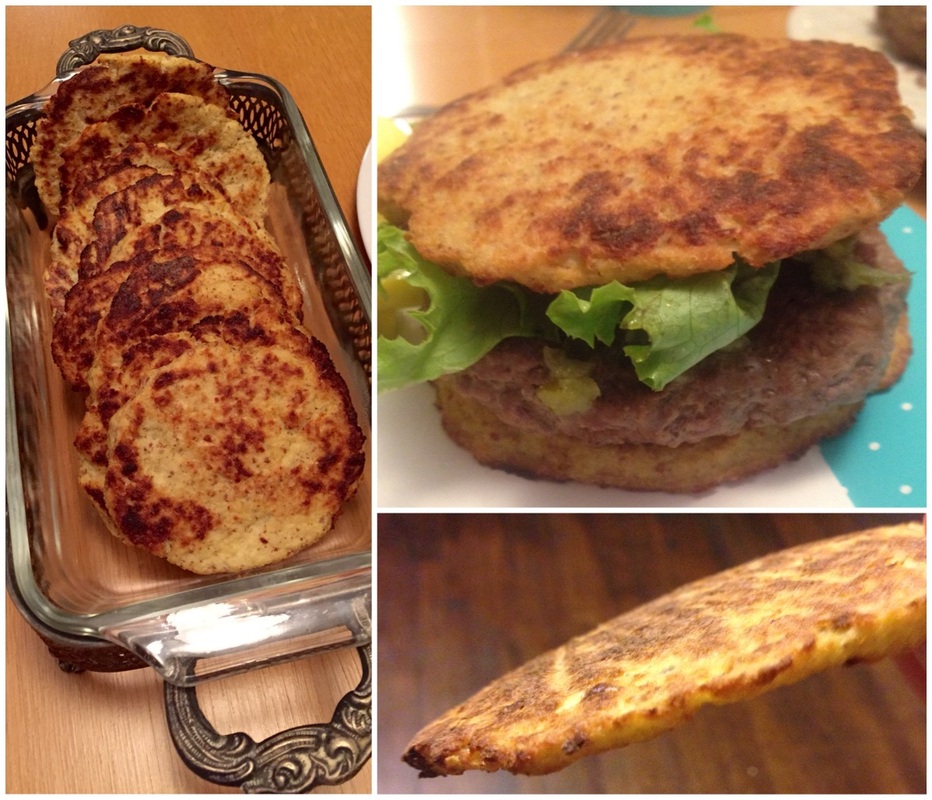
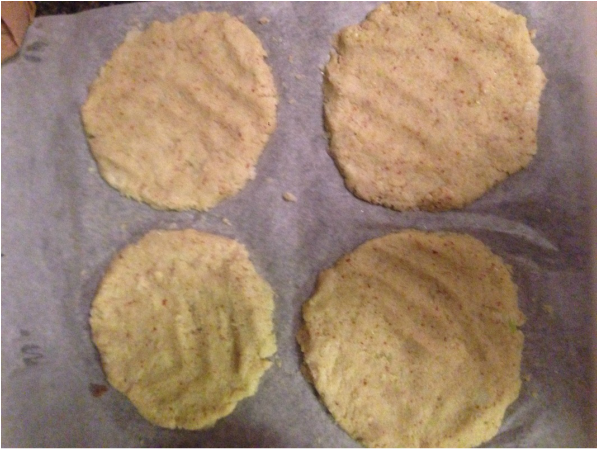
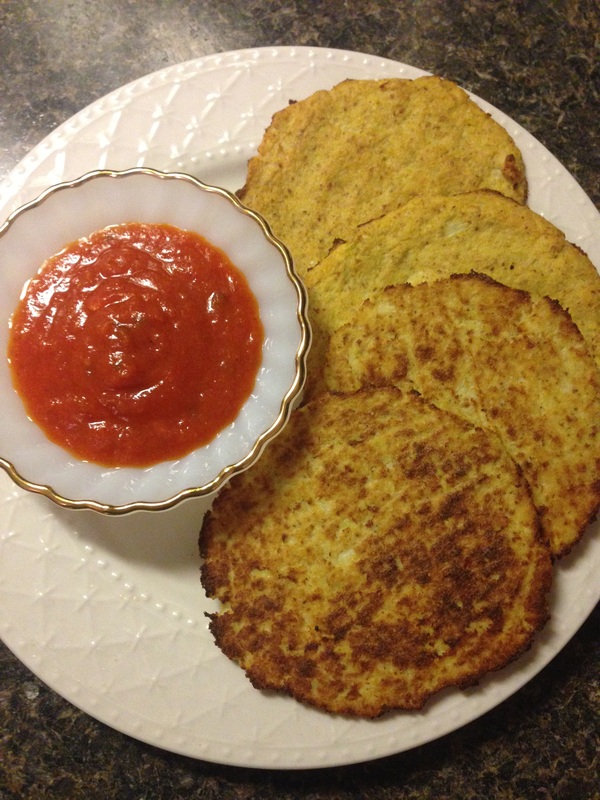
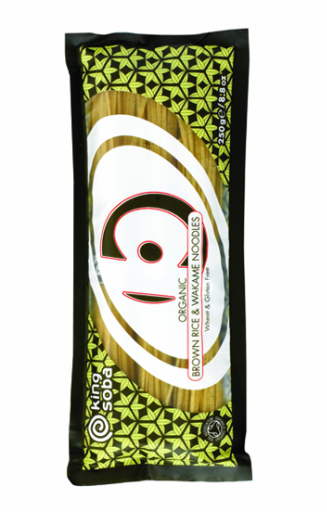
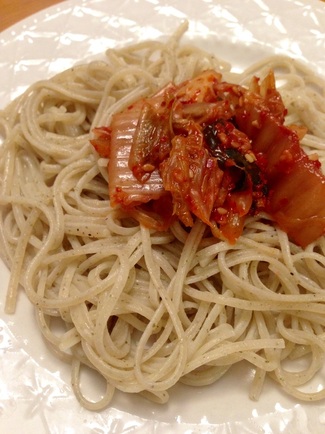
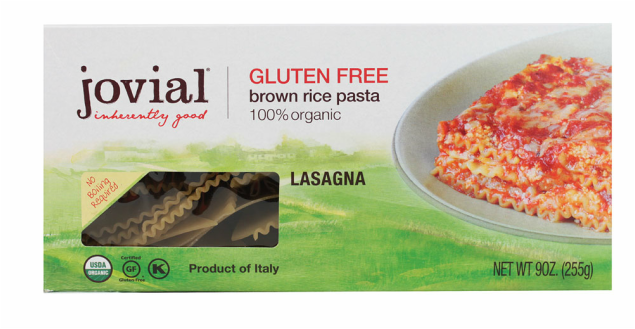
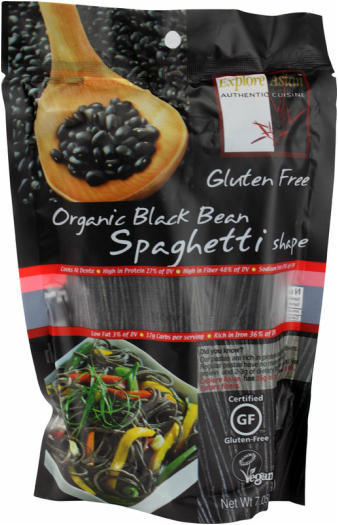
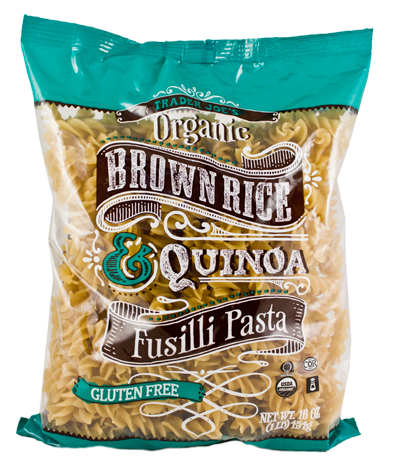
Since shifting my lifestyle three years ago, I thought fair food would be a thing of the past, until I started doing makeovers on life-shortening foods, turning them into life-transforming foods! Last fall, my "clean creation" triumph was my non-GMO blue corn muffins. Quickly, after finding a clean hot dog option, it wasn't long before I put the two together and hoped to goodness blue corn dog muffins would be close to the real deal. Luckily, for me, my family, and (hopefully) yours, it's pretty dang legit! Ingredients: (Always try to use non-GMO, organic ingredients, if possible!) - 1 cup blue corn meal, (I buy the Natural Grocers brand) - 1 cup brown rice flour - 2 tablespoons + 2 tsp brown coconut sugar - 2 teaspoons baking powder - 1/2 teaspoon sea salt - 1 egg - 1/4 cup, heaping, chopped & peeled green apple - 1 cup, unsweetened almond milk - 1 pack of all beef, grass-fed, nitrate-free hot dog franks. (Image of my favorite clean option below.) 1. Preheat oven to 400 degrees. 2. Add chopped apple and almond milk to food processor and blend until liquefied. 3. Blend all ingredients, minus corn meal, together in a food processor until smooth. 4. Then, add corn meal to mixture. Avoid over blending so that you don't lose all of its texture. (Unless you purchase Bob's Red Mill corn meal, which is a courser texture. In that case, add the corn meal with the other ingredients to create a finer consistency.) 5. Coat each muffin cup with non-stick spray or oil. I typically use ghee or coconut oil. Another easy option, great for people on the go, is paper liners. 6. Fill each muffin tin with batter- only half way full, add sliced franks (I cut each frank into 3 pieces), and then top with batter. After topping off each cup, you may need to lightly force some of the franks down a bit more so that they are submerged in the batter. But be sure not to push them too low so that the frank is still centered in the muffin, to avoid a sloppy bottom. 7. Bake for 15-20 minutes. 8. Enjoy!!! These marvelous treats are even delicious after being frozen, stored in an airtight container. Simply reheat by placing them in a preheated oven at 350 degrees for approximately 15 minutes. Also, if you have some family members who don't love hot dogs, you can always use this recipe, sans franks, for a wonderful corn muffin option! In this case, I usually add twice the amount of brown coconut sugar to the recipe but everything else is the exact same. Or, for all of the lovely vegans out there, replace the beef frank with your favorite option! The mustard in the image above is a wonderful organic and gluten-free option by Koop's. Why blue corn? Read this article for the info: http://livehealthy.chron.com/blue-corn-healthier-2206.html Years ago, I purchased this fabulous cookbook that had a collection of some of the best recipes from church cookbooks from around the U.S. I had never actually used it until recent...and I'm really happy I did! Of course, none of the scrumptious comfort foods featured are considered "clean" but in the past 3 years, I've become quite the pro at cleaning up recipes! This one is officially one of my favorites! Ingredients: - 1 cup - brown rice flour - 3/4 cup - xylitol, erythritol, lakanto, or brown coconut sugar (I used a blend of xylitol and white lakanto) - 6 teaspoons - unsweetened, raw, organic cocoa powder, divided - 2 teaspoons - baking powder, aluminum-free - 1/4 teaspoon - sea salt or pink salt - 1/2 cup - organic, unsweetened coconut milk - if canned, BPA-free liner. Unsweetened almond milk and/or coconut milk from the carton also works. - 2 tablespoons - raw, organic coconut oil, softened or melted - 1 teaspoon of organic vanilla extract - 1/4--1/2 cup of organic brown coconut sugar and/or brown lakanto (I used a blend of the two. Since I gave up sugar years ago, I personally preferred the version with just 1/4 cup but my audience of taste testers liked the sweeter version, using 1/2 cup. (Lakanto has no effect on your blood sugar and brown coconut sugar is a low glycemic sweetener.) - 1 3/4 cups - hot water 1. Preheat oven to 350 degrees. 2. Combine flour, white sweetener, 2 tablespoons of cocoa, baking powder, and salt in a large bowl. Then, add oil and vanilla and mix until smooth. Spread batter in an ungreased 9 x 9 x 2-inch baking pan. 3. Combine brown sweetener and remaining 4 tablespoons of cocoa. Sprinkle evenly over top of batter. 4. In a teapot or pan, heat water almost to a boil. (I just added about 2 cups of water to a kettle and once hot, measured out the 1 3/4 cup.) Pour hot water evenly over all of your mixture in pan. Do not stir. 5. Bake for 35-40 minutes. Cool in pan for 10 minutes before cutting to serve. The bottom of this cake will be a gooey consistency. Enjoy! 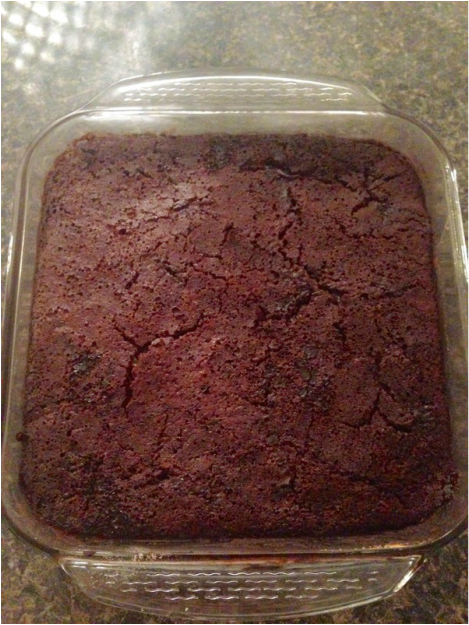 Voila! As you can see, this version looks a tad different from the top version I made. This particular cake I used 1/4 cup sweetener vs. the 1/2 cup. I also diluted the canned coconut milk with a little bit of water to see what it would do if someone were to use a thinner coconut or almond milk from the carton. Other than appearance, the taste didn't really differ, other than sweetness, of course because of the sweetener reduction. The texture was slightly different but not enough to prefer one method over another. Many of my friends and clients are almost in a panic when I say "no bread", when it comes to following the Body Ecology Diet. (There are a few rare types of bread that are almost approved and (eventually) fine in moderation, once you've achieved balance in your body, including: Grindstone Bakery's gluten-free options found on their website and Food for Life's new Sprouted gluten-free options you can find at most health grocery stores.) I somehow went over the two year mark before I decided that it would be might be wise/ fun to start exploring my options-- so that I could hold a hamburger in between something other than lettuce AND so that I could give my clients a silver lining to this "no bread" rule. After surfing the internet for a recipe that didn't include yeast or cheese, I tried a few that were good, but required random ingredients that were either not ideal for your body, or weren't very accessibile. Just recently, I finally fell on one that worked AND I didn't have to make a handful of replacements and modifications (which is usually always the case)! Thanks to The Lucky Penny blog and a few changes by me, here is a fabulously satisfying bread replacement that you can enjoy for pizza, burgers, sandwiches, with hummus, or solo! Depending on how many people, you will need to adjust the volume. I am going to list the amount it took for me to make a top and bottom hamburger bun for 7 people (14 pieces total). Since this recipe is slightly tedious and delicious, I do suggest you make a relatively large batch because it can keep but you probably won't have the opportunity to store it for too long, considering it's delicious and multi-purposeful. Ingredients: - 3 medium-sized heads of cauliflower - 3 eggs - 3 tablespoons of organic, extra-virgin olive oil - 6 tablespoons of almond meal (or almond flour) - approx. 1/2-3/4 teaspoons of pink salt or sea salt (You can add oregano, garlic, basil and other Italian seasoning if you are making it for pizza but since I was using it for burgers, I stuck to salt.) 1. Place baking sheet or pizza stone in oven and preheat to 450 degrees. 2. Pull out a piece of parchment paper and lightly coat with olive oil. (Do not use wax paper- it will melt using such a high temperature.) Leave on counter until "dough" is ready for baking. 3. After rinsing cauliflower, remove leaves and bottom base of florets. In Lucky Penny's instructions it says to remove the base completely and only use florets but I used most the of the cauliflower and it worked just fine utilizing more of the goods! 4. In shifts, add cauliflower to food processor and blend into a snow-like consistency. Make sure you get it into a fine texture without blending it into mush. (That's why I suggest doing small to medium bunches at a time, removing the processed cauliflower into a large bowl as you go.) 5. After all cauliflower is blended into snow, in a large baking pan or wok, heat on stove covered on medium-high heat for approximately 5-8 minutes, mixing every few minutes. It's okay if some of it browns a little but you don't want to cook it all of the way- just until it's tender, keeping its texture. 6. Once it's tender, remove from heat and let cool. 7. KEY STEP! Place cheese cloth or clean kitchen towel* on a large plate and spoon cauliflower on it. Over a large bowl or sink, squeeze out as much moisture as you can. (One of my trial and errors occurred because I didn't remove enough moisture and the vegan pizzas I made pretty much fell apart the second you picked them up.) I do really suggest using a triple-ply cheese cloth because it allows you to strain the cauliflower better than a kitchen towel. And by "triple-ply" I mean, since it comes in a large piece (I bought mine at Natural Grocers), you can cut it so that you can use the other portion for later use but use enough so that you can fold it and there are 2-3 layers- because the cauliflower will squeeze through otherwise. If using a towel, try to use one that's not tightly woven- to insure a better strain- and one that isn't too plush- to avoid a fuzzy, matted mess. 8. Place the grainy lump of cauliflower into large bowl. Add egg, almond meal, olive oil, and desired ingredients and stir until completely mixed. 9. On the parchment paper you have set aside, make desired size rounds. This mixture will not rise or grow so make them the exact size you'd like and feel free to place them tightly next to one another on sheet. 10. Remove baking sheet or pizza brick from the oven, hold it level to your counter, and carefully slide parchment paper onto the baking sheet. By now, the baking sheet is crazy hot so be sure to use your thickest mitt or double up since you will be gripping it for a bit. 11. Bake in oven for approximately 12-15 minutes, or until the edges are browned. This step is optional but I flipped the bread and cooked for an additional 5 minutes or so to crisp the other size a bit. If you don't flip, you may want to cook up to 20 minutes total. 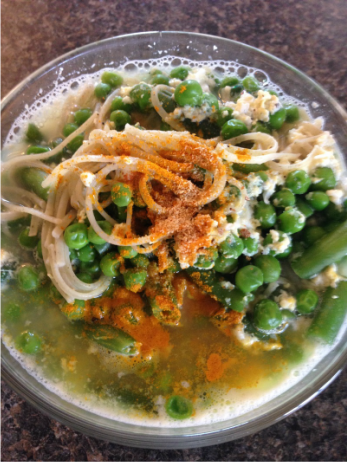 The second thing I did upon my arrival from Los Angeles was promptly tear into my suitcase to get out the NEW exciting noodle I found at my favorite store on the planet, Erewhon Market. (This is, of course, after I fed my yorkie, Eloise, her souvenir organic treat from Trader Joe's!) Erewhon Market is grocery store that really sets the bar where it should be, only offering non-GMO, organic, and ethically sustained foods... which, sadly, makes Whole Foods almost look like a Neighborhood Walmart. Since I started following the Body Ecology Diet 26 months ago, it has been a mission to find tasty noodles. During stage 1, I did attempt to find some quinoa, buckwheat, and millet options and got by but they could only be appreciated as a food in a category of their own and not an equal replacement for your typical noodle. Ex. Eden Selected Buckwheat Soba is one of the only brands that offers 100% pure buckwheat noodles and although they are edible, they are a little pricey and they have the gummy texture that many would expect from a noodle alternative. (Quick fact to avoid confusion: buckwheat isn't wheat but is a complete protein in the seed family.) Another thing you should know, first and foremost, even if it says "quinoa noodle" it usually isn't only quinoa. That also goes for pretty much any other noodle out there. Always read ingredients! For instance, Ancient Quinoa Harvest's "quinoa pasta" not only also has rice flour but, also, corn. This isn't necessarily a bad thing if you can tolerate corn, since it is organic and doesn't contain scary GMOs. BUT, case in point, it can say it's a ____ noodle but can also contain five other ingredients. After following the Body Ecology Diet for almost two years, the moment I entered stage 2 of the diet, I was able to graduate to brown rice. Although this made finding noodles much easier, it wasn't exactly a no-fail process. So, here is my assessment of some of my favorite noodle options! This is wonderful if you are gluten-free or trying to only eat low glycemic foods! King Soba - Organic Brown Rice & Wakame Noodles Verdict: they had a delicious taste and fantastic texture. Added bonus: King Soba also offers other varieties including brown rice & buckwheat and brown rice ramen! For those of you who aren't familiar, wakame is a really nutritious sea vegetable, more popularly called seaweed. Serving Suggestion: This noodle could be eaten Italian-style but would be best paired with a vegetable sauté and/or with a little bit of ghee, pink salt, and fermented veggies. In the image seen above, it is served with Wildbrine's Kimchi. Worth noting: it does hold up served in a soup broth, shown in top image with veggies and egg. Stores: Erewhon Market, Amazon.com Jovial - Brown Rice Pasta This is one of the best options out there if you want a nice, hearty pasta. It has great texture and flavor. This brand carries a variety of shapes, including spaghetti, fusilli, and elbow. I made a clean lasagna for Christmas this past year and everyone was blown away that I used a brown rice noodle that didn't fall apart or taste gummy or mushy. I will note: if making lasagna, I suggest most definitely boiling the noodle before baking, even though they say "no boiling required"! Serving suggestion: This is my go-to for Italian dishes and cold pasta salads, since it keeps its shape and never has an unfavorable texture. Stores: Whole Foods, Natural Grocers, Amazon.com Explore Asian - Organic Black Bean Spaghetti This noodle is purely made with black beans and a little water! I discovered this selection a few years ago at Whole Foods in L.A. and it is now available in Tulsa. (A little secret: if you find yourself really getting tired of ordering online, just ask your local grocery to look into a product you frequently purchase. There have been quite a few instances where I will ask or make mention of a product to a grocery store manager and it actually shows up on the shelves, eventually!) This noodle option is very unique. It has a spongy but nice texture and the flavor is mild but can't really be compared to much, not even black beans. Serving suggestion: As you can see in the image, I made a Mexican Spaghetti with taco-seasoned ground beef, sautéed fajita-style veggies, and vegan nacho cheese sauce. It is a really fun option to add to your Mexican dishes instead of rice, beans, tortillas, or chips! Stores: Whole Foods, Sprouts, Amazon.com Trader Joe's - Organic Brown Rice & Quinoa Fusilli Pasta This is probably my favorite only because it tastes just like you would expect a wheat noodle to taste like but, also, it contains quinoa, which is a complete protein! Serving suggestion: This noodle can be eaten with anything. I do suggest cooking it a tad longer than the instructions but this is my preference, only because it doesn't get gummy and I prefer soft noodles vs. al dente. Stores: Trader Joe's Happy and healthy eating! - Holly
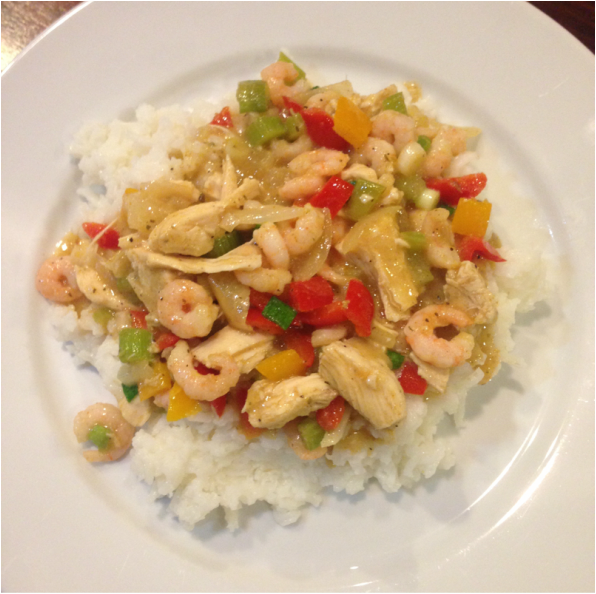
p.s. what you put ON the pasta is just as important as the actual pasta! I prefer adding 80% veggies with 20% noodles and/or using a nut-based cream sauce. Always be sure to check the label because a majority of store-bought sauces and broths contain unnecessary sugar (even organic)! This fresh and festive dish is the perfect way to bring Mardi Gras' Cajun flair to your table!
Jambalaya Sauté Serves 4 Ingredients - it's best to use organic, antibiotic-free, wild-caught, if you can! - 2 medium onions, chopped - 4 stalks of celery, chopped - 1 red pepper, chopped - 1 yellow or orange pepper, chopped - 8 stalks of green onion, chopped - 2 large chicken breasts, shredded or cubed - 4 cups of chicken broth, if purchasing, check the label to avoid getting an option with sugar! I like Imagine. You can also make your own broth by boiling your chicken. - 1 lb. shrimp - 1/3 cup brown rice flour - 3 teaspoons of extra-virgin coconut oil - 1 teaspoon oregano - 1 teaspoon paprika - 3 teaspoons granulated garlic - 1 teaspoon black pepper - 1/4 teaspoon cayenne pepper - 1 teaspoon sea salt or pink salt, add more depending on taste - 1 1/2 cups basmati rice (all of the benefits of wholegrain brown rice but with the taste and texture white rice. Great option for diabetics or those of you looking to eat foods with a low glycemic index) Although this recipe is a breeze, I suggest prepping all ingredients prior to getting started. I personally had made my chicken "bone broth" the day before and purchased frozen cooked shrimp. Bone broth has health-boosting collagen and results in a more gelatin texture, which lends itself nicely to the gravy-like consistency you want to achieve. To make a simple bone broth, simply cook bone-in chicken in boiling water and salt. I also bought Lundberg Farms Organic Basmati Rice and followed the instructions but added a spoonful of ghee while the rice was boiling. After the rice had cooked, (at a point during the directions, you take the rice off of the burner and let sit with the top on it for 10 minutes), I added approx. 1/2 cup of chicken broth to the pot and covered it while I continued cooking for another 20 minutes. 1. to make sure it didn't stick to the bottom of the pot, 2. added flavor, and 3. I like a stickier rice texture. If your chicken isn't cooked yet and you want to make your own broth: add both breasts to a pot of just enough water that the chicken is submerged with 1 tsp of salt. You want the chicken to be cooked thoroughly but use the least amount of water you can get away with (to get more flavor). But, you will be using at least 4 cups of the water/broth for the recipe. Bring the water to a boil and cook until center of chicken is white. Set the chicken aside to shred/ cut into bite-sized pieces, and allow 4-5 cups of broth to chill in the fridge. Instructions: In a large skillet, melt 1 tablespoon of coconut oil, on low heat. Add onion and celery, on medium heat, until mixture becomes slightly transparent, about 5 minutes. Then, add chopped peppers to pan for another 5 minutes, or, until mixture becomes tender. Add remaining 2 tablespoons of coconut oil, stirring until melted. Add brown rice flour, stirring constantly as you pour, until fully mixed in. Add all seasonings. After seasoning and flour are fully stirred and mixture has thickened, add half of your chicken broth to the pan, pouring slowly and stirring constantly. *It's normal for the flour to stick to the bottom of your pan- simply scrape it off the bottom and stir into mixture. Once combined, add remaining broth and increase heat to medium-high. The mixture will thicken so, feel free to add additional broth, to insure a gravy-like consistency. Reduce heat to low. Stir in cooked chicken, cooked shrimp, and green onion, until warm. If you're feeling a little fancy, reserve some of the raw green onion for garnish. Make a nice little nest with your rice, top with the sauté, and... Enjoy! |
Archives
May 2020
Categories
All
|
What Specialists Are Saying About IIN Health Coaches
What is a Health Coach?
All material and information presented by The Radiance Refinery is intended to be used for educational purposes only. The statements made about products, supplements, or treatments have not been evaluated by the Food and Drug Administration (FDA). The information presented on The Radiance Refinery is not intended to treat, cure, or prevent any condition or disease. Please consult with your own physician or health care practitioner before making changes to your diet, exercise routine, or lifestyle.
Privacy Policy Accessibility Cookies










 RSS Feed